计算机竞赛 深度学习 机器视觉 车位识别车道线检测 - python opencv
作者:小教学发布时间:2023-09-28分类:程序开发学习浏览:216
0 前言
🔥 优质竞赛项目系列,今天要分享的是
🚩 深度学习 机器视觉 车位识别车道线检测
该项目较为新颖,适合作为竞赛课题方向,学长非常推荐!
🥇学长这里给一个题目综合评分(每项满分5分)
- 难度系数:3分
- 工作量:3分
- 创新点:4分
🧿 更多资料, 项目分享:
https://gitee.com/dancheng-senior/postgraduate
简介
你是不是经常在停车场周围转来转去寻找停车位。如果你的车辆能准确地告诉你最近的停车位在哪里,那是不是很爽?事实证明,基于深度学习和OpenCV解决这个问题相对容易,只需获取停车场的实时视频即可。
检测效果
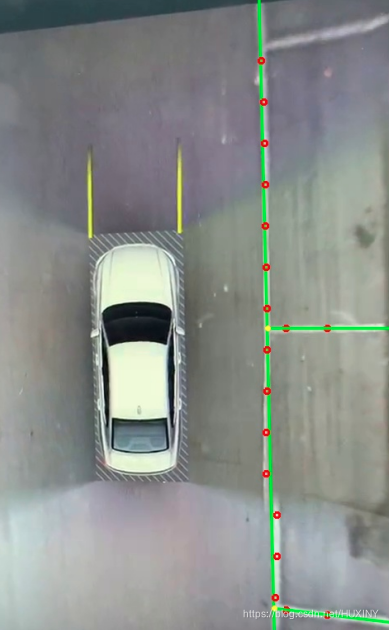
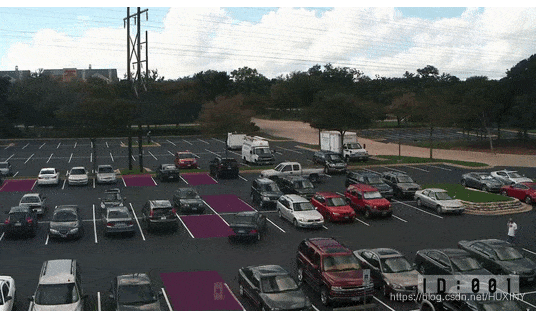
废话不多说, 先上效果图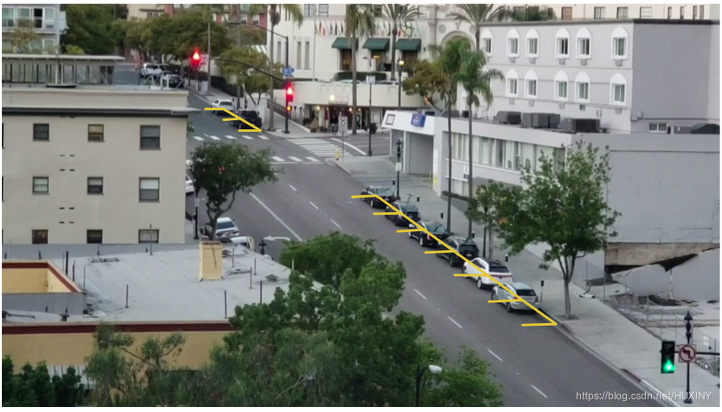
注意车辆移动后空车位被标记上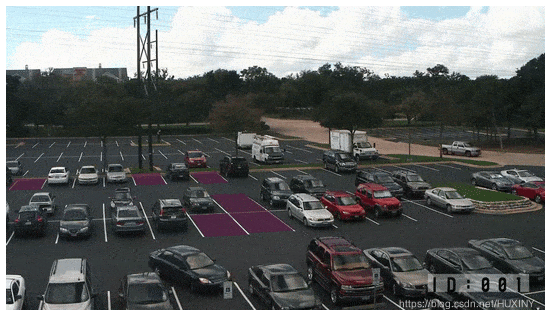
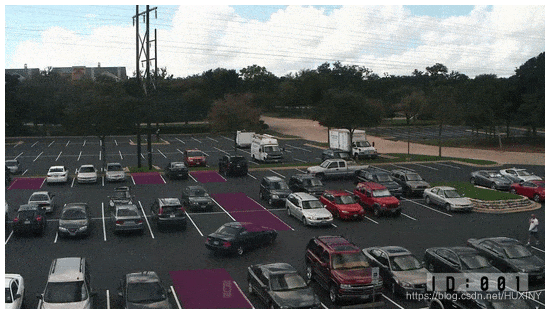
车辆移动到其他车位
实现方式
整体思路
这个流程的第一步就是检测一帧视频中所有可能的停车位。显然,在我们能够检测哪个是没有被占用的停车位之前,我们需要知道图像中的哪些部分是停车位。
第二步就是检测每帧视频中的所有车辆。这样我们可以逐帧跟踪每辆车的运动。
第三步就是确定哪些车位目前是被占用的,哪些没有。这需要结合前两步的结果。
最后一步就是出现新车位时通知我。这需要基于视频中两帧之间车辆位置的变化。
这里的每一步,我们都可以使用多种技术用很多种方式实现。构建这个流程并没有唯一正确或者错误的方式,但不同的方法会有优劣之分。
使用要使用到两个视觉识别技术 :识别空车位停车线,识别车辆
检测空车位
车位探测系统的第一步是识别停车位。有一些技巧可以做到这一点。例如,通过在一个地点定位停车线来识别停车位。这可以使用OpenCV提供的边缘检测器来完成。但是如果没有停车线呢?
我们可以使用的另一种方法是假设长时间不移动的汽车停在停车位上。换句话说,有效的停车位就是那些停着不动的车的地方。但是,这似乎也不可靠。它可能会导致假阳性和真阴性。
那么,当自动化系统看起来不可靠时,我们应该怎么做呢?我们可以手动操作。与基于空间的方法需要对每个不同的停车位进行标签和训练不同,我们只需标记一次停车场边界和周围道路区域即可为新的停车位配置我们的系统。
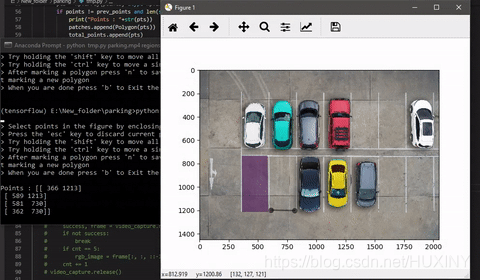
在这里,我们将从停车位的视频流中截取一帧,并标记停车区域。Python库matplotlib
提供了称为PolygonSelector的功能。它提供了选择多边形区域的功能。
我制作了一个简单的python脚本来标记输入视频的初始帧之一上的多边形区域。它以视频路径作为参数,并将选定多边形区域的坐标保存在pickle文件中作为输出。
import os
import numpy as np
import cv2
import pickle
import argparse
import matplotlib.pyplot as plt
from matplotlib.patches import Polygon
from matplotlib.widgets import PolygonSelector
from matplotlib.collections import PatchCollection
from shapely.geometry import box
from shapely.geometry import Polygon as shapely_poly

points = []
prev_points = []
patches = []
total_points = []
breaker = False

class SelectFromCollection(object):
 def __init__(self, ax):
 self.canvas = ax.figure.canvas
 self.poly = PolygonSelector(ax, self.onselect)
 self.ind = []

 def onselect(self, verts):
 global points
 points = verts
 self.canvas.draw_idle()

 def disconnect(self):
 self.poly.disconnect_events()
 self.canvas.draw_idle()

def break_loop(event):
 global breaker
 global globSelect
 global savePath
 if event.key == 'b':
 globSelect.disconnect()
 if os.path.exists(savePath):
 os.remove(savePath)

 print("data saved in "+ savePath + " file")
 with open(savePath, 'wb') as f:
 pickle.dump(total_points, f, protocol=pickle.HIGHEST_PROTOCOL)
 exit()

def onkeypress(event):
 global points, prev_points, total_points
 if event.key == 'n':
 pts = np.array(points, dtype=np.int32)
 if points != prev_points and len(set(points)) == 4:
 print("Points : "+str(pts))
 patches.append(Polygon(pts))
 total_points.append(pts)
 prev_points = points

if __name__ == '__main__':
 parser = argparse.ArgumentParser()
 parser.add_argument('video_path', help="Path of video file")
 parser.add_argument('--out_file', help="Name of the output file", default="regions.p")
 args = parser.parse_args()

 global globSelect
 global savePath
 savePath = args.out_file if args.out_file.endswith(".p") else args.out_file+".p"

 print("\n> Select a region in the figure by enclosing them within a quadrilateral.")
 print("> Press the 'f' key to go full screen.")
 print("> Press the 'esc' key to discard current quadrilateral.")
 print("> Try holding the 'shift' key to move all of the vertices.")
 print("> Try holding the 'ctrl' key to move a single vertex.")
 print("> After marking a quadrilateral press 'n' to save current quadrilateral and then press 'q' to start marking a new quadrilateral")
 print("> When you are done press 'b' to Exit the program\n")

 video_capture = cv2.VideoCapture(args.video_path)
 cnt=0
 rgb_image = None
 while video_capture.isOpened():
 success, frame = video_capture.read()
 if not success:
 break
 if cnt == 5:
 rgb_image = frame[:, :, ::-1]
 cnt += 1
 video_capture.release()

 while True:
 fig, ax = plt.subplots()
 image = rgb_image
 ax.imshow(image)

 p = PatchCollection(patches, alpha=0.7)
 p.set_array(10*np.ones(len(patches)))
 ax.add_collection(p)

 globSelect = SelectFromCollection(ax)
 bbox = plt.connect('key_press_event', onkeypress)
 break_event = plt.connect('key_press_event', break_loop)
 plt.show()
 globSelect.disconnect()
车辆识别
要检测视频中的汽车,我使用Mask-
RCNN。它是一个卷积神经网络,对来自几个数据集(包括COCO数据集)的数百万个图像和视频进行了训练,以检测各种对象及其边界。 Mask-
RCNN建立在Faster-RCNN对象检测模型的基础上。
除了每个检测到的对象的类标签和边界框坐标外,Mask RCNN还将返回图像中每个检测到的对象的像pixel-wise mask。这种pixel-wise
masking称为“ 实例分割”。我们在计算机视觉领域所看到的一些最新进展,包括自动驾驶汽车、机器人等,都是由实例分割技术推动的。
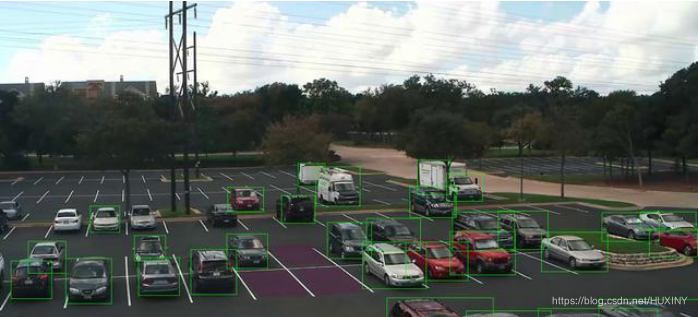
M-RCNN将用于视频的每一帧,它将返回一个字典,其中包含边界框坐标、检测对象的masks、每个预测的置信度和检测对象的class_id。现在使用class_ids过滤掉汽车,卡车和公共汽车的边界框。然后,我们将在下一步中使用这些框来计算IoU。
由于Mask-RCNN比较复杂,这里篇幅有限,需要mask-RCNN的同学联系博主获取, 下面仅展示效果:
最后
🧿 更多资料, 项目分享:
https://gitee.com/dancheng-senior/postgraduate
- 程序开发学习排行
- 最近发表


