【前端】快速掌握HTML+CSS核心知识点
作者:小教学发布时间:2023-09-25分类:程序开发学习浏览:247
文章目录
- 1.HTML核心基础知识
- 1.1.编写第一个HTML网页
- 1.2.超链接a标签和路径
- 1.3.图像img标签的用法
- 1.4.表格table标签用法
- 1.5.列表ul、ol、dl标签用法
- 1.6.表单form标签用法
- 1.7.区块标签和行内标签用法
- 2.CSS核心基础知识
- 2.1.CSS标签选择器+viewport布局
- 2.2.CSS样式的几种写法
- 2.3.CSS常⻅选择器的使用
- 2.4.CSS特殊选择器的使用
- 2.5.CSS基本概念之盒⼦模型
- 2.6.CSS中的常⽤属性
- 3.CSS进阶之布局定位
- 3.1.CSS中布局前置知识
- 3.2.CSS中的float布局
- 3.3.CSS中的flex布局
- 3.4.CSS中的position定位
- 3.5.CSS之三栏布局实现
- 3.6.CSS之⽔平垂直居中
- 3.7.CSS⾼级知识点之BFC
- 4.CSS3常用属性讲解
- 4.1. CSS3边框样式
- 4.2.CSS3渐变样式
- 4.3.CSS3文本效果
- 4.4.CSS3网格布局
1.HTML核心基础知识
1.1.编写第一个HTML网页
<!DOCTYPE html>
<html lang="en">
<head>
    <meta charset="UTF-8">
    <meta http-equiv="X-UA-Compatible" content="IE=edge">
    <meta name="viewport" content="width=device-width, initial-scale=1.0">
    <title>Document</title>
</head>
<body>
    <span>我是lx,我喜欢java</span><br/>
    <span>我喜欢唱,跳,rap,篮球</span><br/>
</body>
</html>
- 快捷键生成html模板
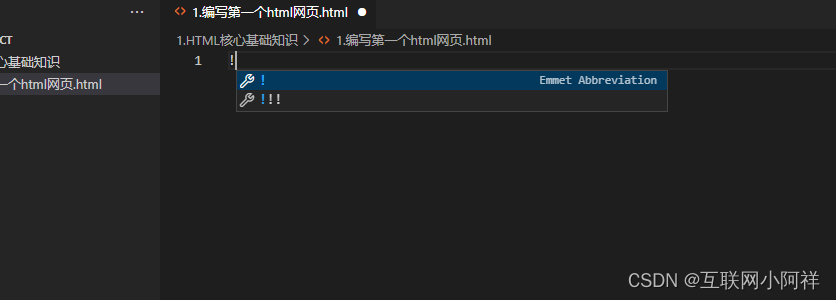
!+回车
- 标签含义
| 标签名 | 定义 | 说明 |
|---|---|---|
| HTML标签 | 页面中最大的标签,根标签 | |
| 文档头部 | 注意在head标签中我们必须设置的标签是title | |
| 文档标题 | 让页面拥有一个属于自己的标题 | |
| 文档主体 | 元素包含文档的所有内容,页面内容 |
1.2.超链接a标签和路径
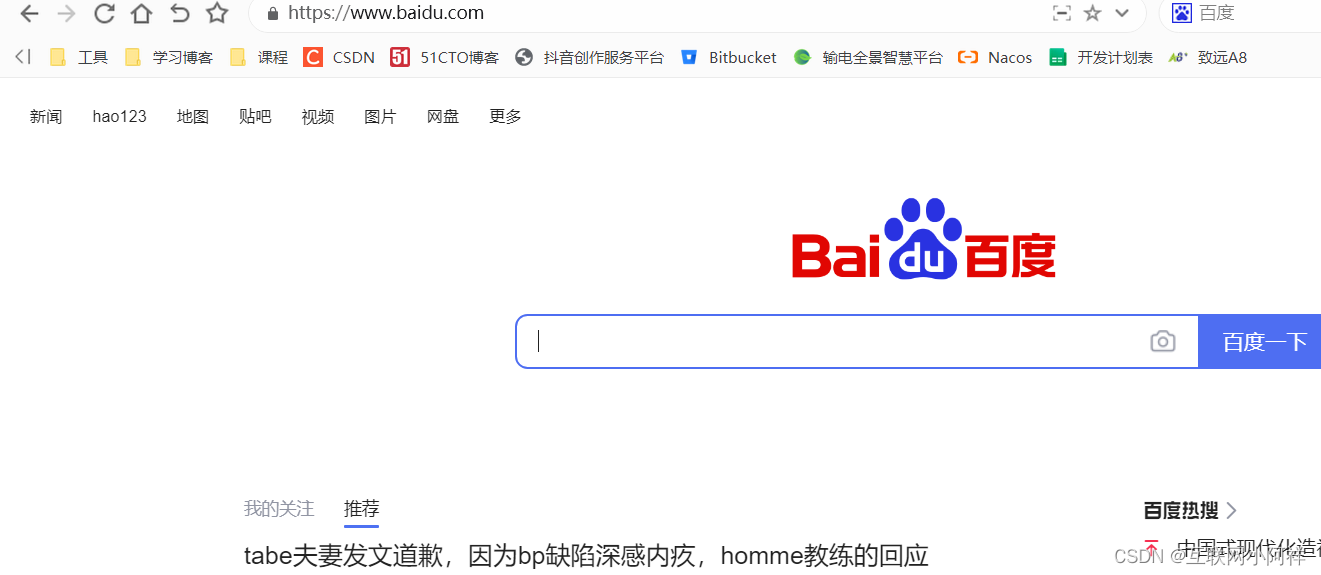
(1)a标签用法
- a是HTML语言标签。
- a标签定义超链接,用于从一个页面链接到另一个页面。
- a元素最重要的属性是href属性,它指定链接的目标。
跳转:<a href="xxx">链接文本</a>
锚点:<a href="#xxx"></a>
<!DOCTYPE html>
<html lang="en">
<head>
    <meta charset="UTF-8">
    <meta http-equiv="X-UA-Compatible" content="IE=edge">
    <meta name="viewport" content="width=device-width, initial-scale=1.0">
    <title>Document</title>
</head>
<body>
    <a href="https://www.baidu.com">百度</a>
</body>
</html>

(2)路径
- 根据资源的类型判断,⼀般站外资源⽤绝对路径,站内资源⽤相对路径
- 绝对路径:从磁盘开始一直到这个文件的整个路径
- 相对路径:相对当前这个文件的路径
- ./ 代表当前⽬录
- …/ 代表的上⼀级⽬录
<!DOCTYPE html>
<html lang="en">
<head>
    <meta charset="UTF-8">
    <meta http-equiv="X-UA-Compatible" content="IE=edge">
    <meta name="viewport" content="width=device-width, initial-scale=1.0">
    <title>Document</title>
</head>
<body>
    <a href="D:\vscodeProject\1.HTML核心基础知识\1.编写第一个html网页.html">绝对路径</a>
    <a href="./1.编写第一个html网页.html">相对路径</a>
</body>
</html>


- 它们都可以跳到1的页面。
1.3.图像img标签的用法
- 常⽤属性
- src
- 图片路径
- alt
- 图⽚加载失败或加载时显示的⽂字
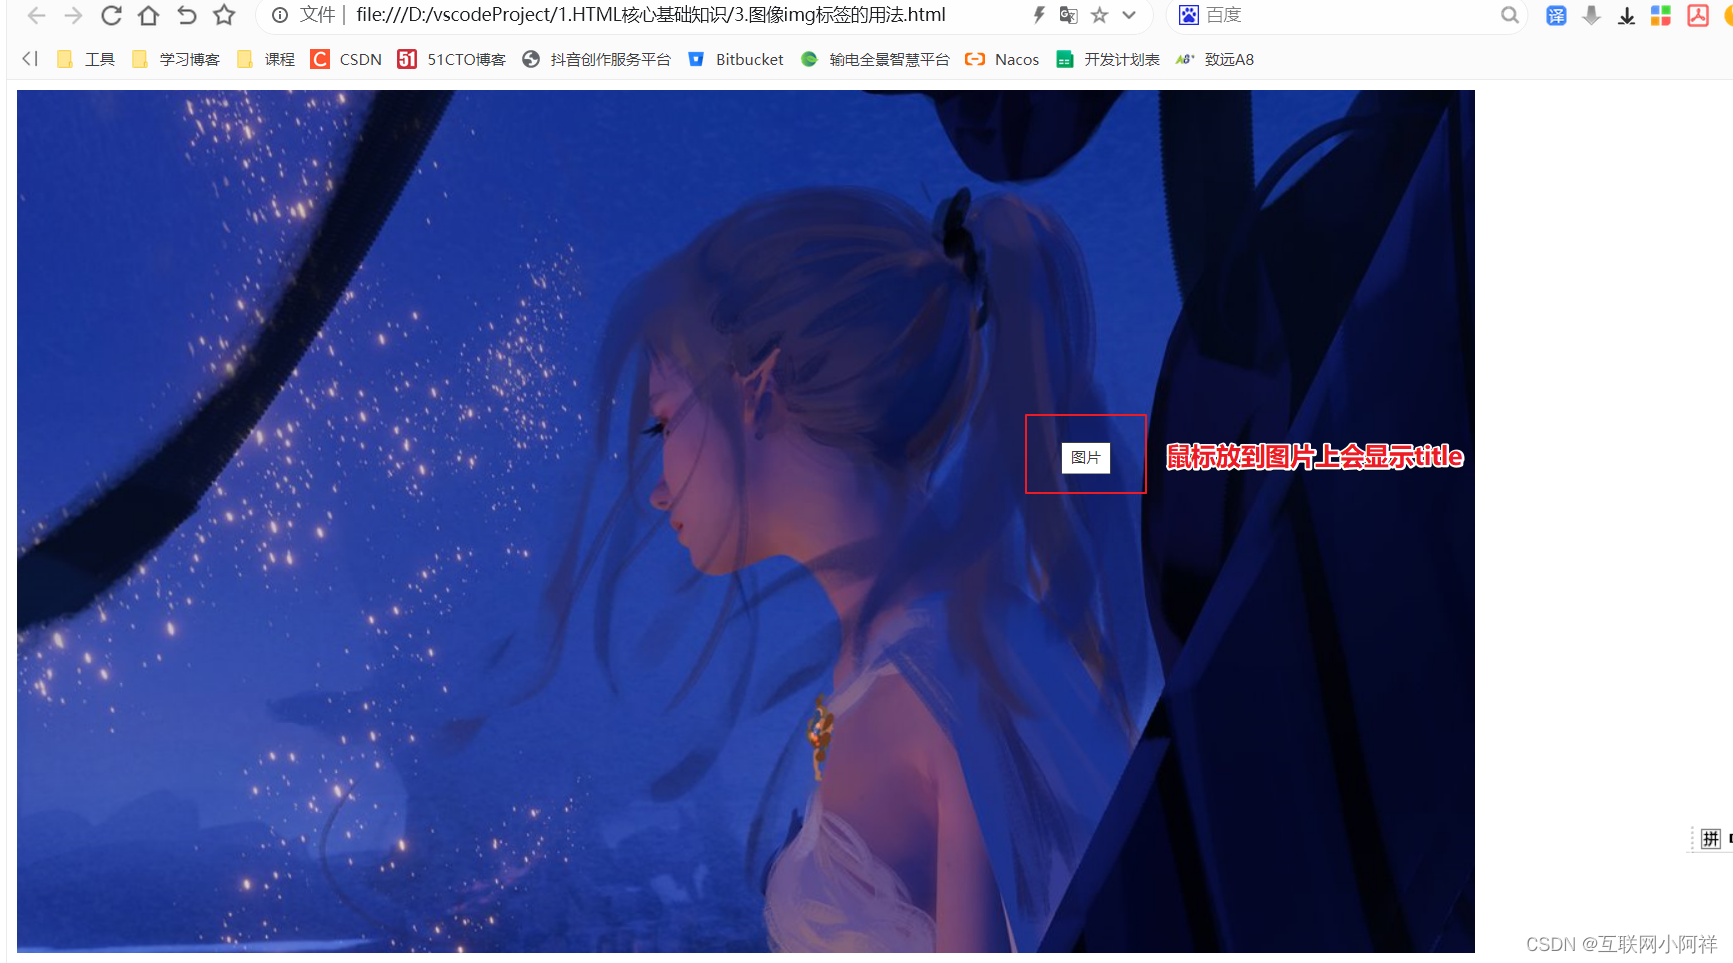
- title
- 悬浮在图片上面显示的文字
- src
- 图片的来源
- 本地图片:稳定
- 线上图片:图片容易丢失
- Base64图片
- 优点:小图片占用内存小,不请求服务器,降低服务器资源与访问
- 缺点:大图片增大了数据库服务器的压力
<!DOCTYPE html>
<html lang="en">
<head>
    <meta charset="UTF-8">
    <meta http-equiv="X-UA-Compatible" content="IE=edge">
    <meta name="viewport" content="width=device-width, initial-scale=1.0">
    <title>Document</title>
</head>
<body>
    <img src="./1.png" alt = "图片显示失败" title="图片"/>
</body>
</html>
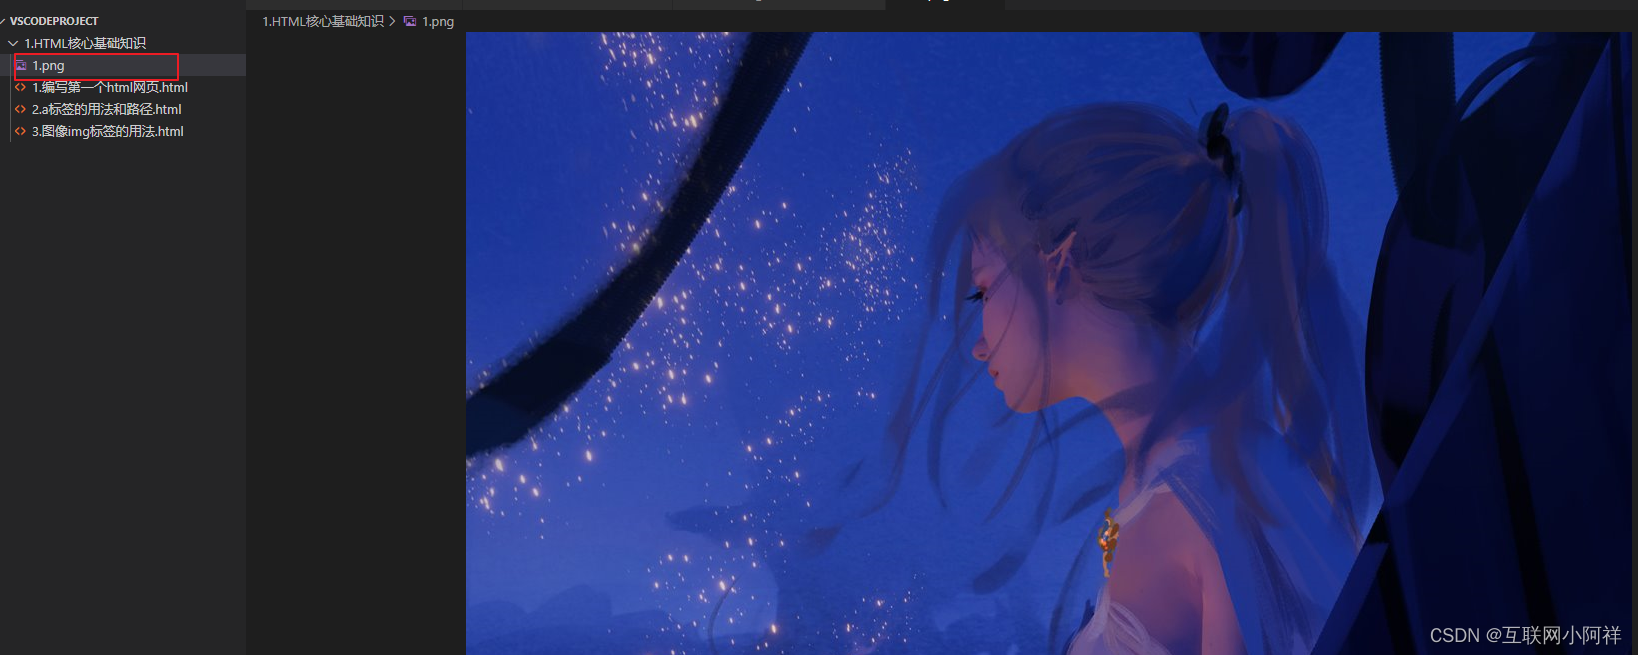
- 将图片放在同级的目录下
1.4.表格table标签用法
- 表格的基本结构
- 由⼀⾏或者多⾏的单元格数据组成
| 姓名 | 性别 | 年龄 |
|---|---|---|
| 张三 | 男 | 18 |
| 李四 | 女 | 18 |
-
在HTML中怎么表示
-
table:HTML 表格
-
tr:元素定义表格行
-
th:数据中的表头单元格
-
td:表示单元格
-
-
table元素⾥常⽤的属性
- border(边框)
- cellspacing(规定单元格之间的空白)
- cellpadding(规定单元边沿与其内容之间的空白)
- colspan(⽤于合并列)
- rowspan(⽤于合并⾏)
-
先初始化一个表格
<!DOCTYPE html>
<html lang="en">
<head>
    <meta charset="UTF-8">
    <meta http-equiv="X-UA-Compatible" content="IE=edge">
    <meta name="viewport" content="width=device-width, initial-scale=1.0">
    <title>Document</title>
</head>
<body>
    <table>
        <tr>
            <th>姓名</th>
            <th>性别</th>
            <th>年龄</th>
        </tr>
        <tr>
            <td>李祥</td>
            <td>男</td>
            <td>18</td>
        </tr>
        <tr>
            <td>张三</td>
            <td>男</td>
            <td>18</td>
        </tr>
    </table>
</body>
</html>

- 设置一个边框
    <table border="1">
        <tr>
            <th>姓名</th>
            <th>性别</th>
            <th>年龄</th>
        </tr>
        <tr>
            <td>李祥</td>
            <td>男</td>
            <td>18</td>
        </tr>
        <tr>
            <td>张三</td>
            <td>男</td>
            <td>18</td>
        </tr>
    </table>

- 规定单元格之间的空白 cellspacing
		<table border="1" cellspacing = "0">
        <tr>
            <th>姓名</th>
            <th>性别</th>
            <th>年龄</th>
        </tr>
        <tr>
            <td>李祥</td>
            <td>男</td>
            <td>18</td>
        </tr>
        <tr>
            <td>张三</td>
            <td>男</td>
            <td>18</td>
        </tr>
    </table>

- 规定单元边沿与其内容之间的空白 cellpadding
		<table border="1" cellspacing = "0" cellpadding = "7">
        <tr>
            <th>姓名</th>
            <th>性别</th>
            <th>年龄</th>
        </tr>
        <tr>
            <td>李祥</td>
            <td>男</td>
            <td>18</td>
        </tr>
        <tr>
            <td>张三</td>
            <td>男</td>
            <td>18</td>
        </tr>
    </table>

- 合并列colspan
		<table border="1" cellspacing = "0" cellpadding = "7">
        <tr>
            <th colspan = "2">姓名</th>
            <th>年龄</th>
        </tr>
        <tr>
            <td>李祥</td>
            <td>男</td>
            <td>18</td>
        </tr>
        <tr>
            <td>张三</td>
            <td>男</td>
            <td>18</td>
        </tr>
    </table>

- 合并⾏rowspan
		<table border="1" cellspacing = "0" cellpadding = "7">
        <tr>
            <th>姓名</th>
            <th>性别</th>
            <th>年龄</th>
        </tr>
        <tr>
            <td rowspan = "2">李祥</td>
            <td>男</td>
            <td>18</td>
        </tr>
        <tr>
            <td>男</td>
            <td>18</td>
        </tr>
    </table>

1.5.列表ul、ol、dl标签用法
- 有序列表
<!DOCTYPE html>
<html lang="en">
<head>
    <meta charset="UTF-8">
    <meta http-equiv="X-UA-Compatible" content="IE=edge">
    <meta name="viewport" content="width=device-width, initial-scale=1.0">
    <title>Document</title>
</head>
<body>
    <ol>
        <li>手机数码</li>
        <li>生活用品</li>
        <li>水果生鲜</li>
        <li>绝味零食</li>
    </ol>
</body>
</html>

- 无序列表
<!DOCTYPE html>
<html lang="en">
<head>
    <meta charset="UTF-8">
    <meta http-equiv="X-UA-Compatible" content="IE=edge">
    <meta name="viewport" content="width=device-width, initial-scale=1.0">
    <title>Document</title>
</head>
<body>
    <ul>
        <li>手机数码</li>
        <li>生活用品</li>
        <li>水果生鲜</li>
        <li>绝味零食</li>
    </ul>
</body>
</html>

- 自定义列表
<!DOCTYPE html>
<html lang="en">
<head>
    <meta charset="UTF-8">
    <meta http-equiv="X-UA-Compatible" content="IE=edge">
    <meta name="viewport" content="width=device-width, initial-scale=1.0">
    <title>Document</title>
</head>
<body>
    <dl>
        <dt>手机数码</dt>
        <dd>iphone14</dd>
        <dd>macbook pro</dd>
        <dd>huawei 14</dd>
        <dt>生活用品</dt>
        <dd>米</dd>
        <dd>醋</dd>
        <dd>西红柿</dd>
    </dl>
</body>
</html>

1.6.表单form标签用法
- 核⼼元素input (核⼼元素)
<body>
    <form>
        <input type="text">
    </form>
</body>

- label (提⾼交互体验的)
<body>
    <form>
        <input type="checkbox" id = "isagree">
        <label for="isagree">同意</label>
    </form>
</body>

- select(下拉框)
<body>
    <form>
        <select>
            <option value="1">男</option>
            <option value="2">女</option>
        </select>
    </form>
</body>

- textarea(⽂本域)
<body>
    <form>
        <textarea>文本域</textarea>
    </form>
</body>

- button(按钮)
<body>
  <form>
     <button>提交</button>
  </form>
</body>

- form(表单元素,提交每个表单项内容)
1.7.区块标签和行内标签用法
-
div元素
- div 元素是块级元素,它可用于组合其他 HTML 元素的容器。
- div 元素没有特定的含义。除此之外,由于它属于块级元素,浏览器会在其前后显示折行
- 如果与 CSS 一同使用,div 元素可用于对大的内容块设置样式属性。
- div 元素的另一个常见的用途是文档布局
-
span元素
- span 元素是行内元素,可用作文本的容器
- span 元素也没有特定的含义。
- 当与 CSS 一同使用时,span 元素可用于为部分文本设置样式属性。
-
块级元素
-
块级元素在浏览器显示时,通常会以新行来开始(和结束)
<h1>, <p>, <ul>, <table>,<div>
-
-
行内元素
-
行内元素在显示时通常不会以新行开始
<b>, <td>, <a>, <img>,<span>
-
<style>
    .lixiang{
        color: blue;
    }
    .zhangsan{
        color: brown;
    }
    .wangwu{
        color: chartreuse;
    }
</style>
<body>
    <div>
        <span class="lixiang">李祥</span>
    </div>
    <div>
        <span class="zhangsan">张三</span>
    </div>
    <div>
        <span class="wangwu">王五</span>
    </div>
</body>

2.CSS核心基础知识
2.1.CSS标签选择器+viewport布局
(1)什么是标签选择器
- 标签选择器主要针对的是页面中某个标签中的样式设置,它的作用范围是这个页面内所有写在该标签内的内容,标签选择器可以定义多个标签的样式。
- 语法
    <style>
        标签名{
                属性:属性值;
             }
    </style>
- 案例
<style>

    div{
        width: 200px;
        height: 200px;
        background-color: burlywood;
    }

</style>
<body>
    <div></div>
</body>

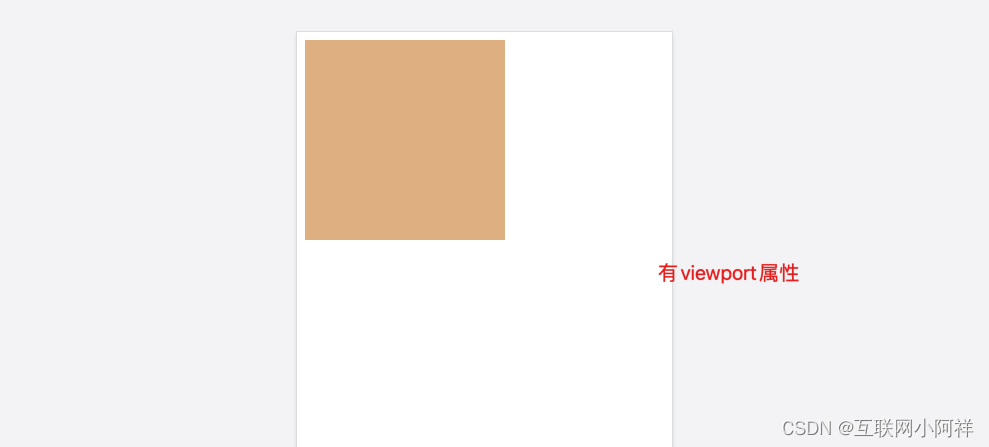
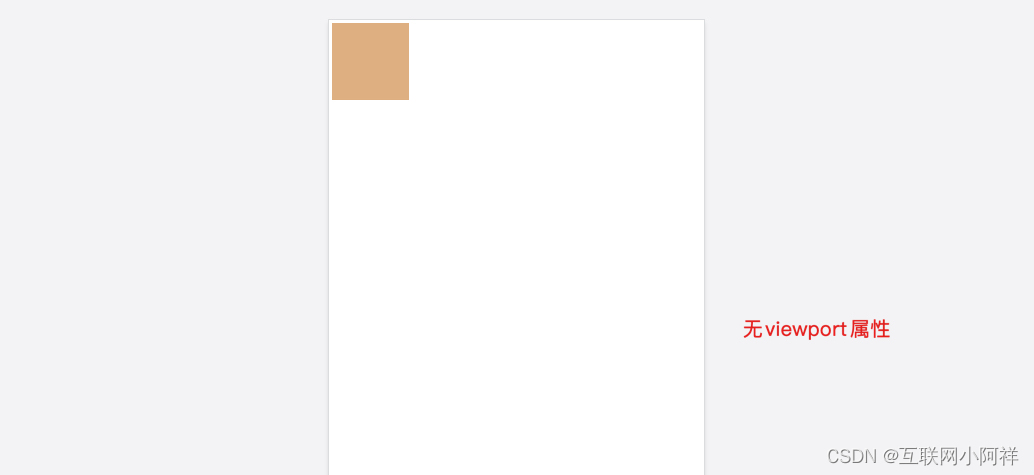
(2)什么是viewport布局
- 手机浏览器是把页面放在一个虚拟的“窗口”(viewport)中,通常这个虚拟的“窗口”(viewport)比屏幕宽。
- 这样就不用把每个网页挤到很小的窗口中,也不会破坏没有针对手机浏览器优化的网页的布局,用户可以通过平移和缩放来看网页的不同部分。
- 移动版的 Safari 浏览器最新引进了viewport 这个 meta tag,让网页开发者来控制 viewport 的大小和缩放,其他手机浏览器也基本支持。
<meta name="viewport" content="width=device-width, initial-scale=1.0">
2.2.CSS样式的几种写法
-
写法
-
内部样式表
- 写在元素的style标签⾥⾯的
<style> div{ width: 200px; height: 200px; background-color: burlywood; } </style> <body> <div></div> </body> -
内联样式表
- 写在styles属性⾥⾯的
<body> <div style="width: 100px; height: 100px; background-color: azure;"></div> </body> -
外部样式表
- link标签将css资源引⼊
<head> <meta charset="UTF-8"> <meta http-equiv="X-UA-Compatible" content="IE=edge"> <meta name="viewport" content="width=device-width, initial-scale=1.0"> <title>Document</title> <link rel="stylesheet" href="./css/index.css"> </head> <style> </style> <body> <div></div> </body> </html>div{ width: 200px; height: 200px; background-color: burlywood; }
-
-
为什么选择外部样式表
- 解决⻚⾯当中样式重复的问题
- 代码分离,利于代码维护和阅读
- 浏览器会缓存起来,提⾼⻚⾯响应速度变快了
2.3.CSS常⻅选择器的使用
(1)元素(标签)选择器
- 最常见的 CSS 选择器是元素选择器。换句话说,文档的元素就是最基本的选择器。
- 如果设置 HTML 的样式,选择器通常将是某个 HTML 元素,比如 p、h1、em、a,甚至可以是 html 本身。
- html {color:black;} h1 {color:blue;} h2 {color:silver;} 可以将某个样式从一个元素切换到另一个元素。
div{
    width: 200px;
    height: 200px;
    background-color: burlywood;
}
(2)组合选择器
- 页面元素比较复杂,存在多个嵌套。为了更加灵活选择页面中的元素,CSS中还提供了组合选择器。
- 组合选择器就是将多个基本选择器通过一定的规则连接起来组成一个复杂选择器。
h1,p
{
  color:red;
}

(3)类选择器
- 结合标签选择器
h1.lixiang
{
  color:red;
}

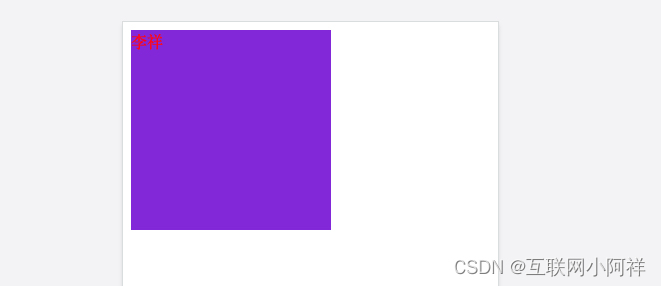
- 多类选择器
- 两个类的样式全部生效
<style>
    .lixiang{
        color:red;
    }
    .background{
        background-color: blueviolet;
    }
</style>
<body>
    <div class="lixiang background"></div>
</body>
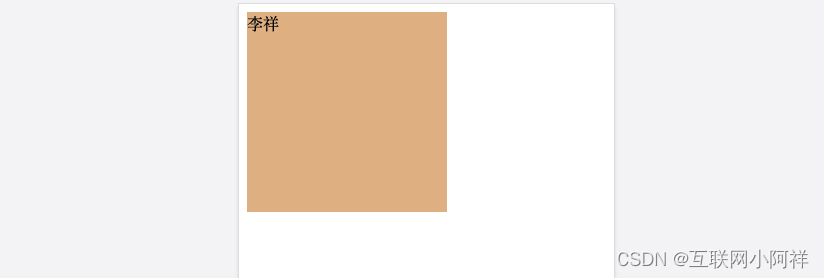
- 链接多个类选择器
.xiaodi.background
{
  color:red;
  background-color:black
}

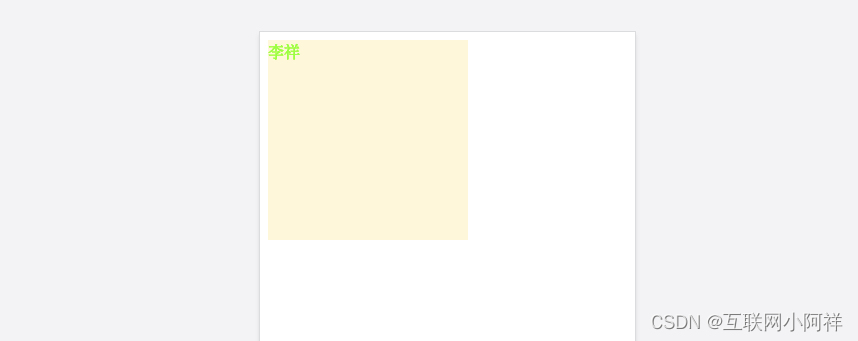
(4)id选择器
声明:#important{}

属性:id="important

注意:一个id选择器的属性值在html文档中只能出现一次,避免写js获取id时出现混淆
<style>
    #lixiang{
        color: greenyellow;
        background-color: cornsilk;
    }
</style>
<body>
    <div id="lixiang">李祥</div>
</body>
(5)通配符选择器
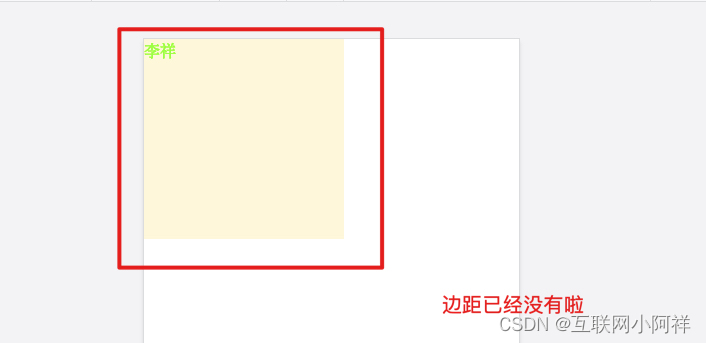
通配符选择器使用*来定义,表示选区页面中所有的标签。优先级最低,一般是在页面初始化的时候才使用,或者某些特殊情况下例如清除页面内外边距。
    *{
        margin: 0;
        padding: 0;
    }
(6)派⽣选择器
- 后代选择器,h1下的p标签才会变成红色
<style>
    h1 p{
        color: red;
    }

</style>
<body>
    <h1>
        <p>张三</p>
    </h1>
    <p>李祥</p>
</body>

- ⼦元素选择器,选择h1下的p标签
<style>
    h1>p{
        color: gray;
    }

</style>
<body>
    <h1>
        <p>张三</p>
    </h1>
</body>

- 相邻选择器(兄弟)
h1+p{
  background-color:pink;
}
2.4.CSS特殊选择器的使用
- 不改变任何DOM内容。只是插入了一些修饰类的元素
(1):first-child {} 第一项
<style>
    li:first-child{
        color: red;
    }

</style>
<body>
    <ul>
        <li>李祥</li>
        <li>张三</li>
        <li>王五</li>
    </ul>
</body>

(2):last-child {} 最后一项
<style>
    li:last-child{
        color: red;
    }

</style>
<body>
    <ul>
        <li>李祥</li>
        <li>张三</li>
        <li>王五</li>
    </ul>
</body>

(3):nth-child(n) {} 第n项
<style>
    li:nth-child(2){
        color: red;
    }

</style>
<body>
    <ul>
        <li>李祥</li>
        <li>张三</li>
        <li>王五</li>
    </ul>
</body>

(4):nth-child(2n+1){} 奇数项
<style>
    li:nth-child(2n+1){
        color: red;
    }

</style>
<body>
    <ul>
        <li>李祥</li>
        <li>张三</li>
        <li>王五</li>
    </ul>
</body>

(5):nth-child(2n) {} 偶数项
<style>
    li:nth-child(2n){
        color: red;
    }

</style>
<body>
    <ul>
        <li>李祥</li>
        <li>张三</li>
        <li>王五</li>
    </ul>
</body>

(6):not() 否定伪类 除了第n项
<style>
    li:not(nth-child(2n)){
        color: red;
    }

</style>
<body>
    <ul>
        <li>李祥</li>
        <li>张三</li>
        <li>王五</li>
    </ul>
</body>

(7)::first-letter 第一个
    <style>
        p::first-letter{
            color: red;
        }

    </style>
    <body>
        <p>
            我是李祥。<br/>
            我来自中国。<br/>
            我喜欢编程。
        </p>
    </body>

(8)::first-line 第一行 只能用于块级元素
<style>
        p::first-line{
            color: red;
        }

    </style>
    <body>
        <p>
            我是李祥。<br/>
            我来自中国。<br/>
            我喜欢编程。
        </p>
    </body>

(9)::before 在开始位置加入内容
    <style>
        p::before{
            content: '开头';
            color: red;
        }

    </style>
    <body>
        <p>
            我是李祥。<br/>
            我来自中国。<br/>
            我喜欢编程。
        </p>
    </body>

(10)::after 在结束位置加入内容
<style>
        p::after{
            content: '结尾';
            color: red;
        }

    </style>
    <body>
        <p>
            我是李祥。<br/>
            我来自中国。<br/>
            我喜欢编程。
        </p>
    </body>

2.5.CSS基本概念之盒⼦模型
(1)什么是盒⼦模型
- 在CSS⾥⾯,所有的HTML元素你都可以看成是⼀个盒⼦
(2)盒⼦的内容(content)
- 元素的大小
(3)盒⼦的内边距(padding)
padding-left:10px   //左边距10px

padding-top:10px    //上边距10px

padding-right:10px  //右边距10px

padding-bottom:10px //下边距10%,相对于父级元素的width


padding:10px 10px 10px 10% //等同于上面四行 百分比是对应父标签的大小

padding:5px 10px    //上下边距5px、左右边距10px

padding:5px 10px 20px  //上边距 左右边距 下边距

padding:10px        //上下左右边距10px
(4)盒⼦的边框(border)
border-left:3px solid #000  //左边距10px dotted dashed

border-top:3px solid #000 //上边距10px

border-right:3px solid #000 //右边距10px

border-bottom:3px solid #000  //下边距10%,相对于父级元素的width

border:3px solid #000 //等同于上面四行
(5)盒⼦的外边距(margin)
margin-left:10px  //左边距10px

margin-top:10px   //上边距10px

margin-right:10px //右边距10px

margin-bottom:10% //下边距10%,相对于父级元素的width

margin:10px 10px 10px 10% //等同于上面四行

margin:5px 10px   //上下边距5px、左右边距10px

margin:10px       //上下左右边距10px
(6)盒子怪异模型
- W3C标准的盒子模型(标准盒模型 )
boxWidth=contentWidth
- IE标准的盒子模型(怪异盒模型)
box-sizing:border-box //声明
boxWidth=contentWidth+border+padding
(7)外边距折叠
-
上下两个兄弟盒子的margin都为正取大,都为负取小,一正一负相加
-
父子元素盒子的margin(假设没有内边距或边框把外边距分隔开),也会合并;
只有普通文档流中块框的垂直外边距才会发生外边距合并。行内框、浮动框或绝对定位之间的外边距不会合并
解决父子边距合并:

父元素{

  overflow:auto;

}

父元素::before{

  display: table;

  content: "";

}
2.6.CSS中的常⽤属性
(1)盒⼦的位置和⼤⼩
- 尺寸
宽度 width: ⻓度|百分⽐|auto
⾼度 height
边界 margin padding 上右下左|上下左右
- 布局
浮动:float
定位:position
弹性布局:flex
盒⼦内容超出部分:overflow:hidden | scroll | auto
(2)外观,⻛格
background-image:属性设置一个或多个背景图像
background-repeat:属性设置如何平铺背景图像
background-size:属性规定背景图像的尺寸
background-position:属性设置背景图像的起始位置
background-color:属性设置元素的背景颜色
(3)⽂字属性
字体⼤⼩:font-size
是否加粗:font-weight
是不是斜体:font-style
字体是什么:font-family
3.CSS进阶之布局定位
3.1.CSS中布局前置知识
(1)正常元素怎么布局
- 默认,⼀个块级元素的内容宽度就是其⽗元素的100%,他的⾼度和其内容⾼度⼀致
- ⾏内元素它的宽度和⾼度都是根据内容决定的(⽆法设置⾏内元素的宽⾼)
- 可设置display属性,定义元素的类型(css3定义布局)
例如:<span>标签,行级元素
<!DOCTYPE html>
<html lang="en">
<head>
    <meta charset="UTF-8">
    <meta http-equiv="X-UA-Compatible" content="IE=edge">
    <meta name="viewport" content="width=device-width, initial-scale=1.0">
    <title>Document</title>
    <style>
        span{
            width: 20px;
            height: 20px;
        }
    </style>
</head>
<body>
    <span>我叫李祥。</span>我是一名IT工程师。
</body>
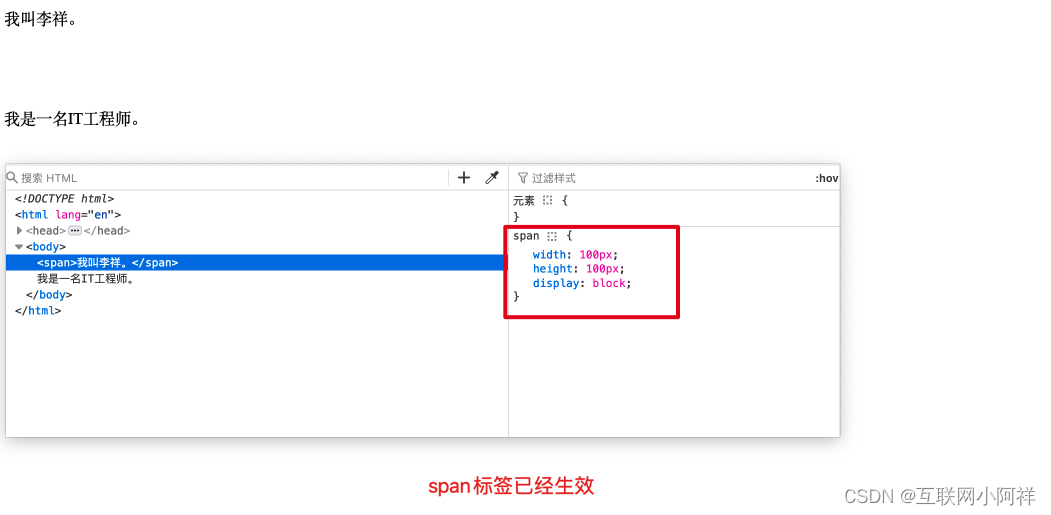
即使我们给他设置了高宽的大小,也没有显示。

想要让span标签变成块级元素,需设置display属性。
        span{
            width: 100px;
            height: 100px;
            display: block;
        }
(2)元素之间⼜是如何相互影响的呢
- 正常的⽂档布局流
- 每个块级元素会在上个元素下⾯另起⼀⾏
- ⾏内元素不会另起⼀⾏
3.2.CSS中的float布局
使用浮动
float: none;  //默认值,元素不浮动
float: left;	//元素像左浮动
float: right; //元素像右浮动
特点:
- 浮动元素会脱离文档流,不再占据文档流空间
- 浮动元素彼此之间是从左往右排列,宽度超过一行自动换行
- 在浮动元素前面元素不浮动时,浮动元素无法上移
- 块级元素和行内元素浮动之后都变成行内块级元素
- 浮动元素不会盖住文字,可以设置文字环绕效果
清除浮动
clear:both;
content:'';
display:block;
(1)两个div,让下方的div瓢到上方的右边
<!DOCTYPE html>
<html lang="en">
<head>
    <meta charset="UTF-8">
    <meta http-equiv="X-UA-Compatible" content="IE=edge">
    <meta name="viewport" content="width=device-width, initial-scale=1.0">
    <title>Document</title>
    <style>
        .div1{
            width: 100px;
            height: 100px;
            background-color: blue;
            float: left;
        }
        .div2{
            width: 100px;
            height: 100px;
            background-color: brown;
            float: left;
        }
    </style>
</head>
<body>
    <div class="div1"></div>
    <div class="div2"></div>
</body>
</html>

(2)两个div,让下方的div瓢到上方的右边
<!DOCTYPE html>
<html lang="en">
<head>
    <meta charset="UTF-8">
    <meta http-equiv="X-UA-Compatible" content="IE=edge">
    <meta name="viewport" content="width=device-width, initial-scale=1.0">
    <title>Document</title>
    <style>
        .div1{
            width: 100px;
            height: 100px;
            background-color: blue;
            float: right;
        }
        .div2{
            width: 200px;
            height: 200px;
            background-color: brown;
            float: right;
        }
    </style>
</head>
<body>
    <div class="div1"></div>
    <div class="div2"></div>
</body>
</html>

(3)两个div实现图层叠加的效果
<!DOCTYPE html>
<html lang="en">
<head>
    <meta charset="UTF-8">
    <meta http-equiv="X-UA-Compatible" content="IE=edge">
    <meta name="viewport" content="width=device-width, initial-scale=1.0">
    <title>Document</title>
    <style>
        .div1{
            width: 100px;
            height: 100px;
            background-color: blue;
            float: left;
        }
        .div2{
            width: 200px;
            height: 200px;
            background-color: brown;
        }
    </style>
</head>
<body>
    <div class="div1"></div>
    <div class="div2"></div>
</body>
</html>

3.3.CSS中的flex布局
W3C提出了一种新的方案—Flex布局,可以简便、完整、响应式地实现各种页面布局。目前,它已经得到了所有浏览器的支持,这意味着,现在就能很安全地使用这项功能。
Flex是Flexible Box的缩写,意为”弹性布局”,用来为盒状模型提供最大的灵活性。
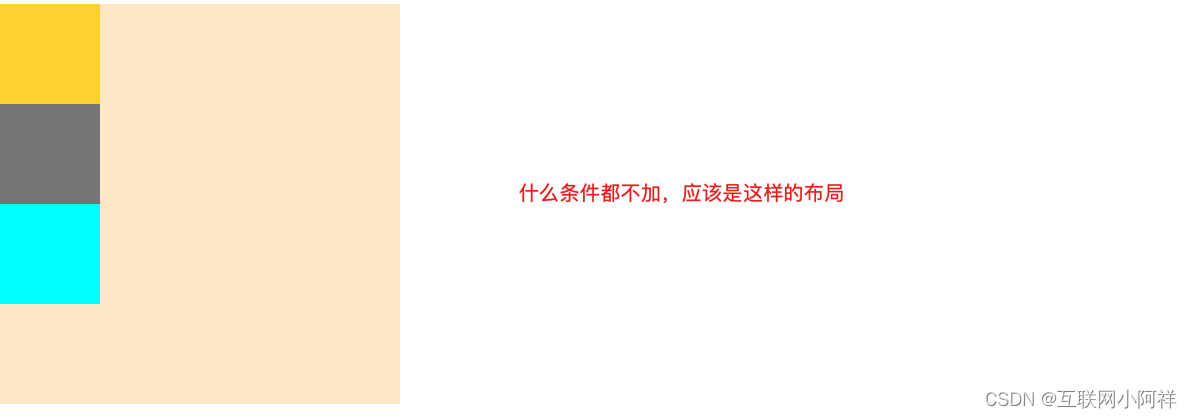
测试代码:
<!DOCTYPE html>
<html lang="en">
<head>
    <meta charset="UTF-8">
    <meta http-equiv="X-UA-Compatible" content="IE=edge">
    <meta name="viewport" content="width=device-width, initial-scale=1.0">
    <title>Document</title>
    <style>
        .f{
            width: 400px;
            height: 400px;
            background-color: blanchedalmond;
        }
        .a1{
            width: 100px;
            height: 100px;
            background-color: gold;
        }
        .a2{
            width: 100px;
            height: 100px;
            background-color: gray;
        }
        .a3{
            width: 100px;
            height: 100px;
            background-color: aqua;
        }
    </style>
</head>
<body>
    <div class="f">
        <div class="a1"></div>
        <div class="a2"></div>
        <div class="a3"></div>
    </div>
</body>
</html>
父元素容器的属性
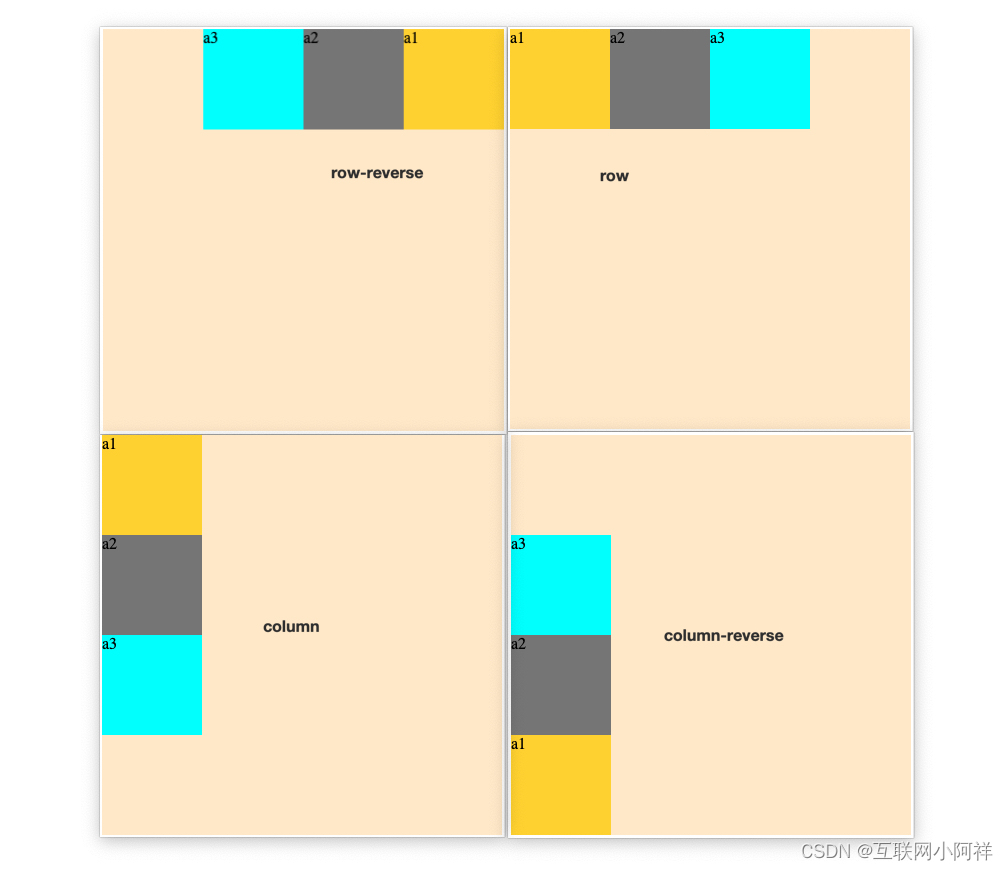
(1)flex-direction属性
flex-direction属性有4个值:
- row(默认值):主轴为水平方向,起点在左端(项目从左往右排列)
- row-reverse:主轴为水平方向,起点在右端(项目从右往左排列)
- column:主轴为垂直方向,起点在上沿(项目从上往下排列)
- column-reverse:主轴为垂直方向,起点在下沿(项目从下往上排列)
/* 决定主轴的方向(即项目的排列方向)*/
flex-direction: row | row-reverse | column | column-reverse;
(2)flex-wrap属性
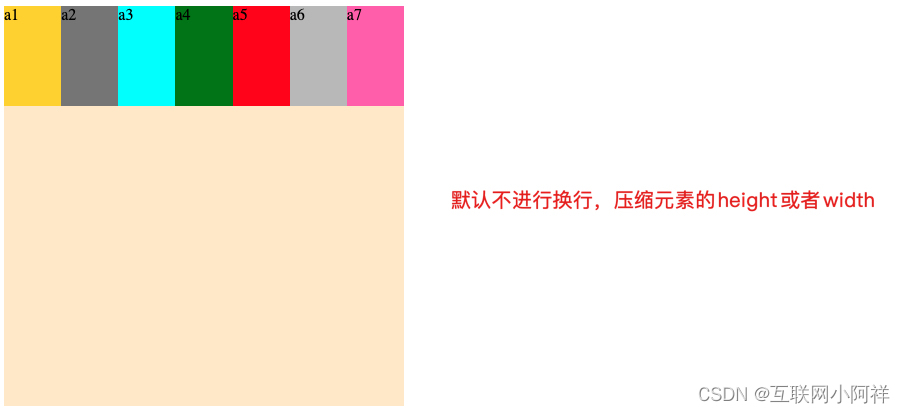
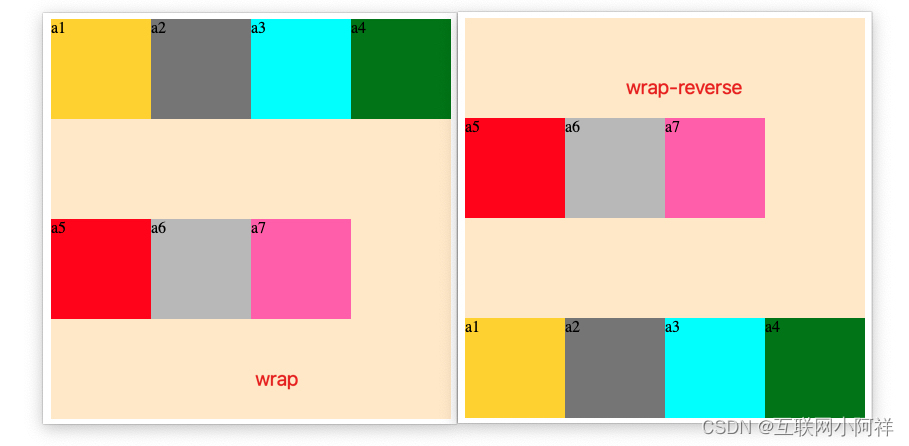
默认情况下,项目都排在一条线(又称”轴线”)上。flex-wrap属性定义,如果一条轴线排不下,如何换行。
flex-wrap属性有3个值:
- nowrap(默认):不换行(列)。
- wrap:主轴为横向时:从上到下换行。主轴为纵向时:从左到右换列。
- wrap-reverse:主轴为横向时:从下到上换行。主轴为纵向时:从右到左换列。
测试代码:
<!DOCTYPE html>
<html lang="en">
<head>
    <meta charset="UTF-8">
    <meta http-equiv="X-UA-Compatible" content="IE=edge">
    <meta name="viewport" content="width=device-width, initial-scale=1.0">
    <title>Document</title>
    <style>
        .f{
            width: 400px;
            height: 400px;
            background-color: blanchedalmond;
            display: flex;
            flex-direction:row;
        }
        .a1{
            width: 100px;
            height: 100px;
            background-color: gold;
        }
        .a2{
            width: 100px;
            height: 100px;
            background-color: gray;
        }
        .a3{
            width: 100px;
            height: 100px;
            background-color: aqua;
        }
        .a4{
            width: 100px;
            height: 100px;
            background-color: green;
        }
        .a5{
            width: 100px;
            height: 100px;
            background-color: red;
        }
        .a6{
            width: 100px;
            height: 100px;
            background-color: silver;
        }
        .a7{
            width: 100px;
            height: 100px;
            background-color: hotpink;
        }
    </style>
</head>
<body>
    <div class="f">
        <div class="a1">a1</div>
        <div class="a2">a2</div>
        <div class="a3">a3</div>
        <div class="a4">a4</div>
        <div class="a5">a5</div>
        <div class="a6">a6</div>
        <div class="a7">a7</div>
    </div>
</body>
</html>
/* 是否换行 */
flex-wrap: nowrap | wrap | wrap-reverse;
(3)flex-flow属性
flex-flow属性是flex-direction属性和flex-wrap属性的简写形式,默认值为row nowrap。
flex-flow: <flex-direction> <flex-wrap>;
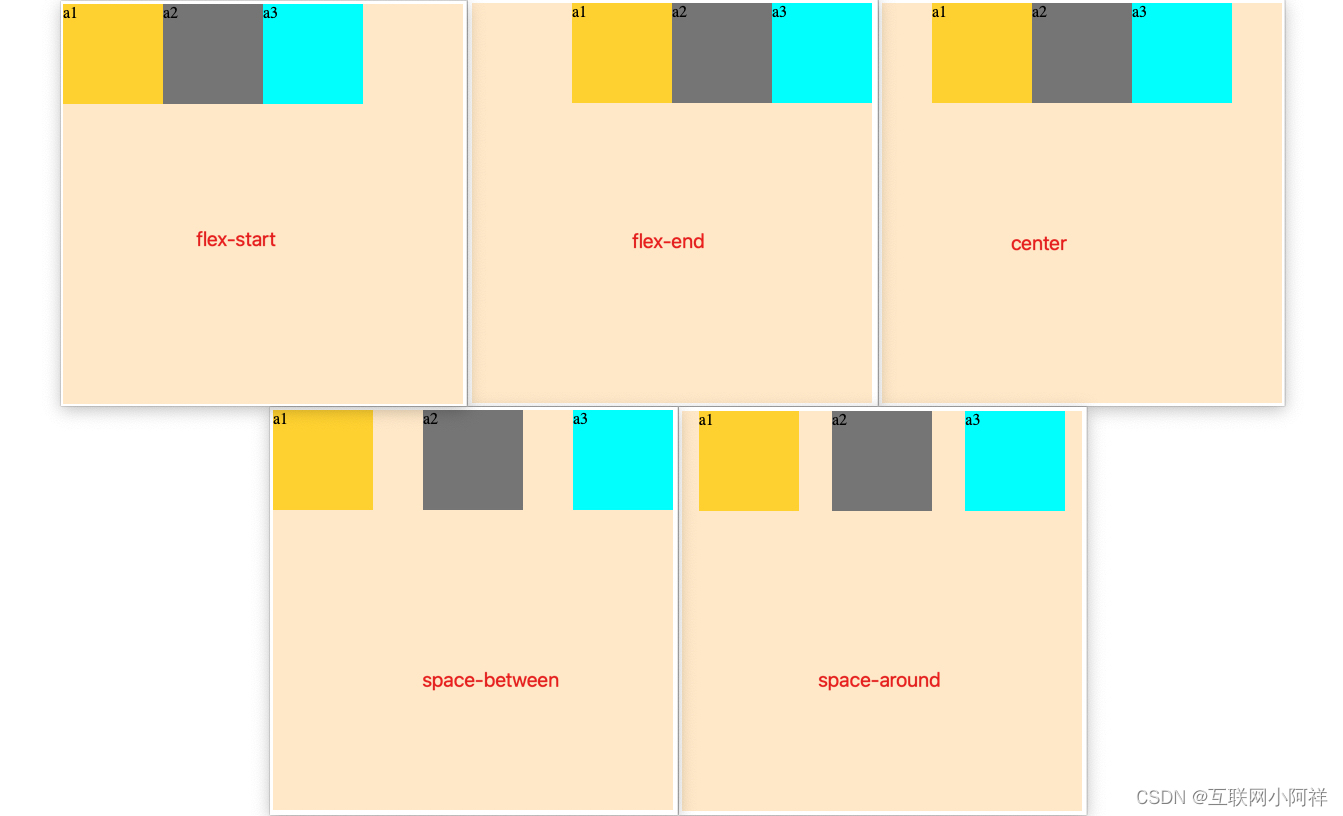
(4)justify-content属性
ustify-content属性定义了项目在主轴上的对齐方式。
justify-content属性有5个值:
- flex-start(默认):与主轴的起点对齐。
- flex-end:与主轴的终点对齐。
- center:与主轴的中点对齐。
- space-between:两端对齐主轴的起点与终点,项目之间的间隔都相等。
- space-around:每个项目两侧的间隔相等。所以,项目之间的间隔比项目与边框的间隔大一倍。
/* 定义水平方向对齐方式 */
justify-content: flex-start | flex-end | center | space-between | space-around;
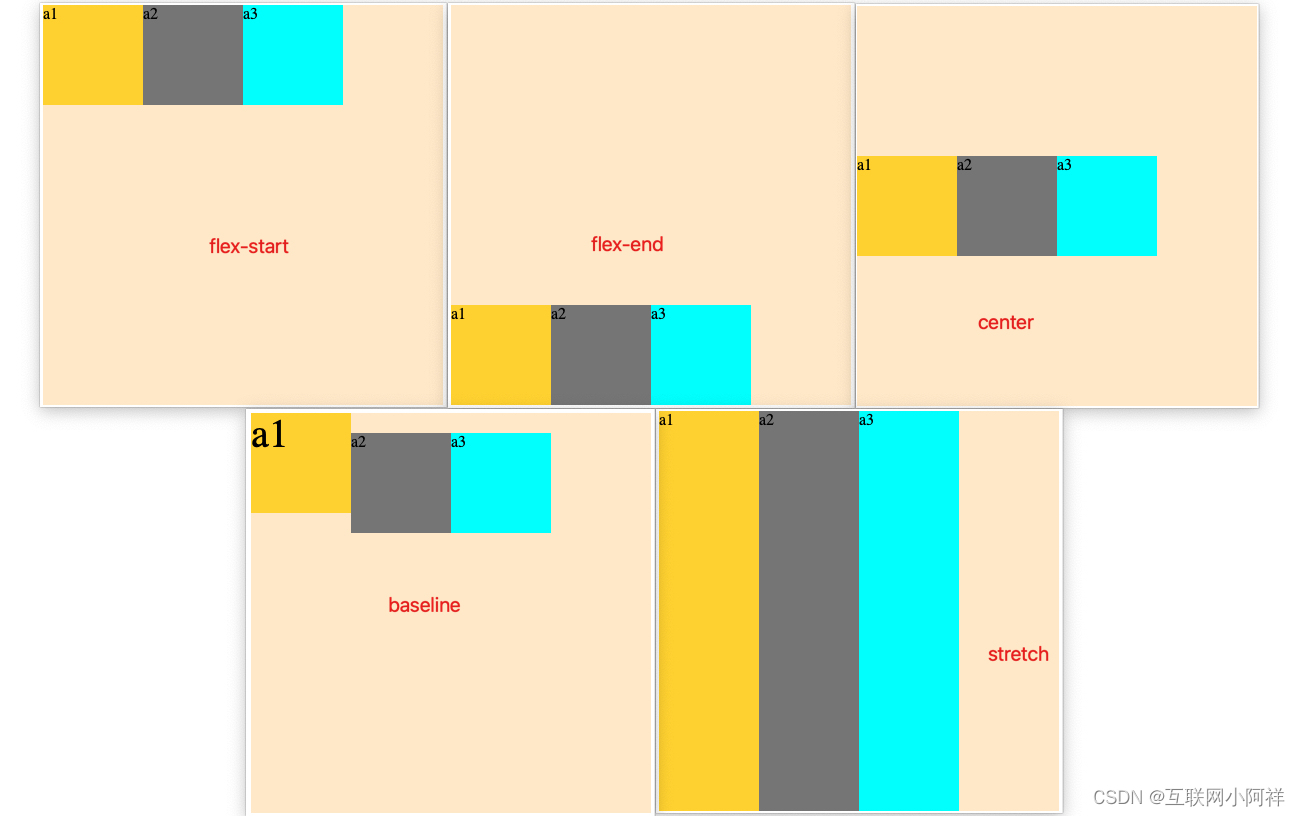
(5)align-items属性
align-items属性定义项目在交叉轴上如何对齐。纵向交叉轴始终自上而下,横向交叉轴始终自左而右。
align-items属性有5个值:
- flex-start:交叉轴的起点对齐。
- flex-end:交叉轴的终点对齐。
- center:交叉轴的中点对齐。
- baseline: 项目的第一行文字的基线对齐。
- stretch(默认值):如果项目未设置高度或设为auto,项目将占满整个容器的高度。
/* 定义垂直方向对齐方式 */
align-items: flex-start | flex-end | center | baseline | stretch;
(6)align-content属性
align-content属性定义了多根轴线的对齐方式。如果项目只有一根轴线,该属性不起作用。
align-content属性有6个值:
- flex-start:与交叉轴的起点对齐。
- flex-end:与交叉轴的终点对齐。
- center:与交叉轴的中点对齐。
- space-between:与交叉轴两端对齐,轴线之间的间隔平均分布。
- space-around:每根轴线两侧的间隔都相等。所以,轴线之间的间隔比轴线与边框的间隔大一倍。
- stretch(默认值):主轴线占满整个交叉轴。
子元素容器的属性
(1)order属性
order属性定义项目的排列顺序。数值越小,排列越靠前,默认为0。
/* 定义子元素的排列顺序,默认为0 */
order: -10 | -1 | 0 | 1 | 10;

(2)flex-grow属性
flex-grow属性定义项目的放大比例,默认为0,即如果存在剩余空间,也不放大。
/* 定义子元素的放大比例,默认为0 */
flex-grow: 0 | 1 | 2 | 3;

(3)flex-basis属性
flex-basis属性定义了在分配多余空间之前,项目占据的主轴空间(main size)。浏览器根据这个属性,计算主轴是否有多余空间。它的默认值为auto,即项目的本来大小。
/* 定义了在分配多余空间之前,项目占据的主轴空间 */
flex-basis: <length> | auto;
(4)flex属性
flex属性是flex-grow, flex-shrink 和 flex-basis的简写,默认值为0 1 auto。后两个属性可选。
/* flex-grow, flex-shrink 和 flex-basis的简写 */
flex: 0 1 auto;
选择float布局 or flex布局?
推荐是使用flex布局,flex布局易用,布局全面。float的创建初衷只是为了达到文字环绕的效果,另外需要清除浮动。现在几乎所有公司的产品使用场景都在浏览器ie9以上。
3.4.CSS中的position定位
(1)static:默认值,静态定位,表示没有定位,元素会按照正常的位置显示,此时 top、bottom、left 和 right 4 个定位属性也不会被应用。
(2)relative:相对定位,即相对于元素的正常位置进行定位,您可以通过 top、right、bottom、left 这 4 个属性来设置元素相对于正常位置的偏移量,在此过程中不会对其它元素造成影响。
(3)absolute:绝对定位,相对于第一个非 static 定位的父级元素进行定位,可以通过 top、right、bottom、left 这 4 个属性来设置元素相对于父级元素位置的偏移量。如果没有满足条件的父级元素,则会相对于浏览器窗口来进行定位。使用绝对定位的元素不会对其它元素造成影响。
(4)fixed:固定定位,相对于浏览器的创建进行定位,可以使用 top、right、bottom、left 这 4 个属性来定义元素相对于浏览器窗口的位置。使用固定定位的元素无论如何滚动浏览器窗口元素的位置都是固定不变的。
(5)sticky:粘性定位,它是 relative 和 fixed 的结合体,能够实线类似吸附的效果,当滚动页面时它的效果与 relative 相同,当要滚动到屏幕之外时则会自动变成 fixed 的效果。
测试代码:
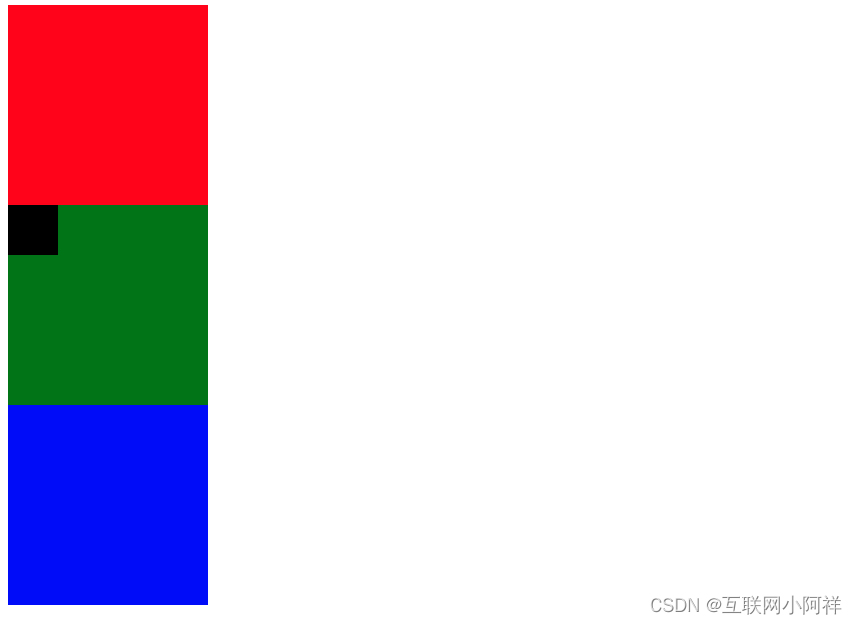
<!DOCTYPE html>
<html lang="en">
<head>
    <meta charset="UTF-8">
    <meta http-equiv="X-UA-Compatible" content="IE=edge">
    <meta name="viewport" content="width=device-width, initial-scale=1.0">
    <title>Document</title>
    <style>
        .a1{
            width: 200px;
            height: 200px;
            background-color: red;
        }
        .a2{
            width: 200px;
            height: 200px;
            background-color: green;
        }
        .a3{
            width: 200px;
            height: 200px;
            background-color: blue;
        }
        .a22{
            width: 50px;
            height: 50px;
            background-color: black;
        }
    </style>
</head>
<body>
    <div class="a1"></div>
    <div class="a2">
        <div class="a22"></div>
    </div>
    <div class="a3"></div>
</body>
</html>
(1)让黑块跑到绿块的最右边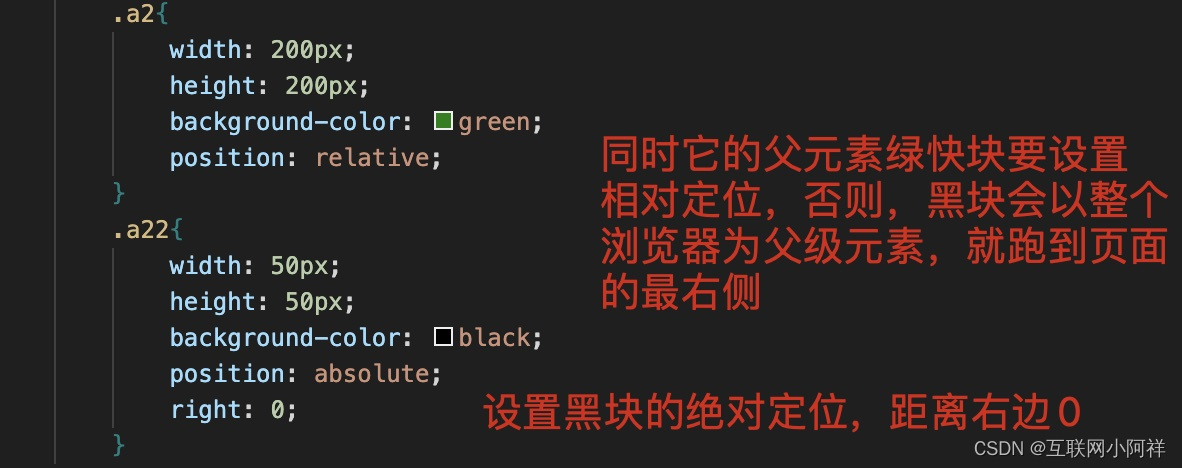
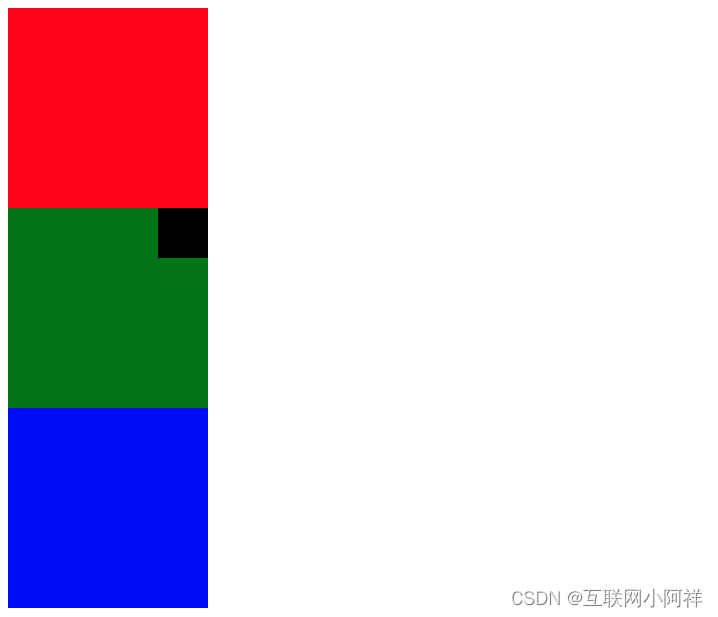
(2)设置一个悬浮的窗口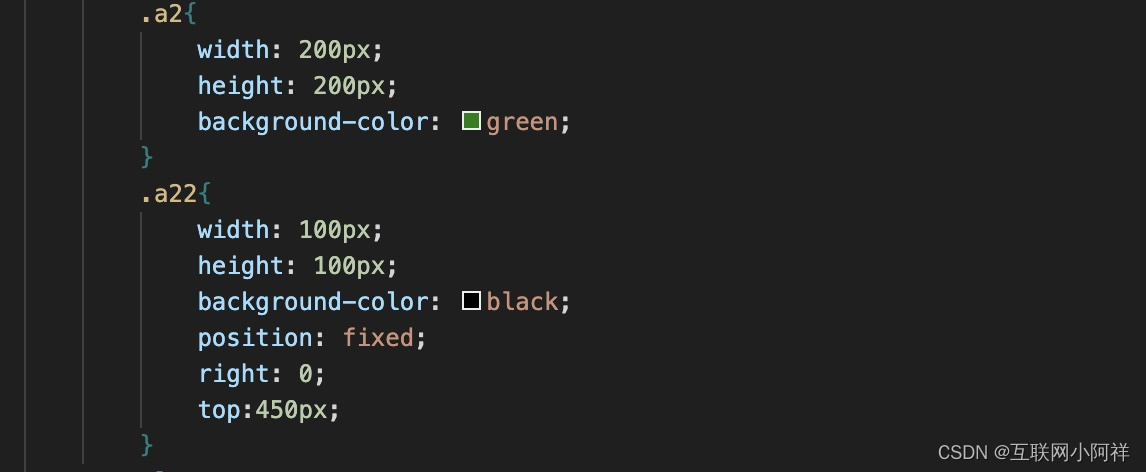
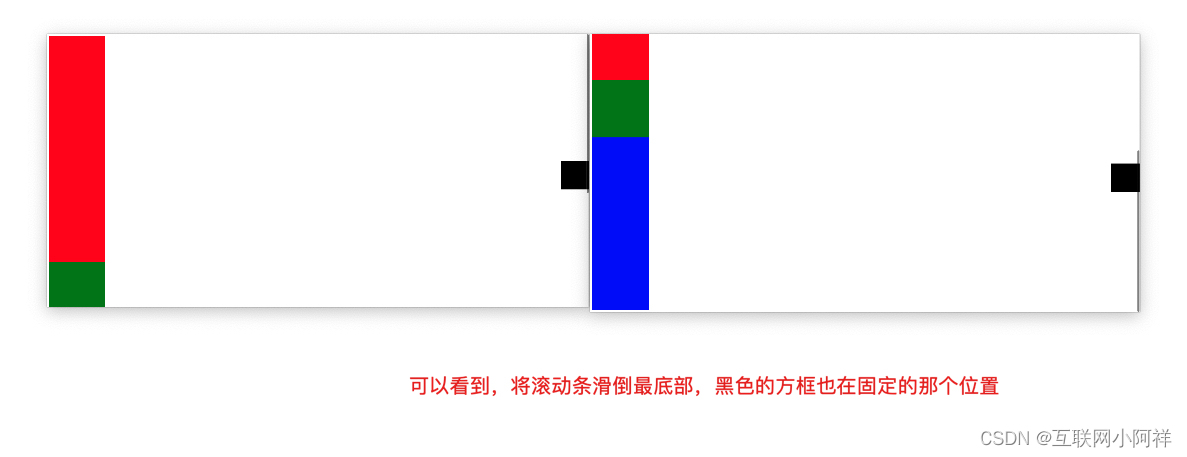
(3)粘性定位案例


3.5.CSS之三栏布局实现
(1)float实现
<head>
    <meta charset="UTF-8">
    <meta name="viewport" content="width=device-width, initial-scale=1.0">
    <title>Document</title>
    <style>
        * {
            margin: 0;
            padding: 0;
        }
.left {
    width: 200px;
    height: 300px;
    background-color: red;
    float: left;
}

.right {
    width: 200px;
    height: 300px;
    background-color: blue;
    float: right;
}

.center {
    height: 300px;
    background-color: green;
    margin: 0 200px;
}
</style>
</head>

<body>
    <div class="father">
        <div class="left"></div>
        <div class="right"></div>
        <div class="center"></div>
    </div>
</body>
</html>
(2)position实现
<head>
    <meta charset="UTF-8">
    <meta name="viewport" content="width=device-width, initial-scale=1.0">
    <title>Document</title>
    <style>
        * {
            margin: 0;
            padding: 0;
        }
.left {
    width: 200px;
    height: 300px;
    background-color: red;
    position: absolute;
    left: 0;
}

.right {
    width: 200px;
    height: 300px;
    background-color: blue;
    position: absolute;
    right: 0;
}

.center {
    height: 300px;
    background-color: green;
    margin: 0 200px;
}
</style>
</head>

<body>
    <div class="father">
        <div class="left"></div>
        <div class="right"></div>
        <div class="center"></div>
    </div>
</body>

</html>
(3)flex实现
<head>
    <meta charset="UTF-8">
    <meta name="viewport" content="width=device-width, initial-scale=1.0">
    <title>Document</title>
    <style>
        * {
            margin: 0;
            padding: 0;
        }
.left {
    width: 200px;
    height: 300px;
    background-color: red;
}

.right {
    width: 200px;
    height: 300px;
    background-color: blue;
}

.center {
    flex: 1;
    height: 300px;
    background-color: green;
}
.father {
    display: flex;
}
</style>
</head>

<body>
    <div class="father">
        <div class="left"></div>
        <div class="center"></div>
        <div class="right"></div>
    </div>
</body>

</html>
效果演示:

3.6.CSS之⽔平垂直居中
(1)⾏内块元素
通过line-height、text-align: center实现。
<!DOCTYPE html>
<html lang="en">
<head>
    <meta charset="UTF-8">
    <meta http-equiv="X-UA-Compatible" content="IE=edge">
    <meta name="viewport" content="width=device-width, initial-scale=1.0">
    <title>Document</title>
</head>

<style>
    span{
        width: 200px;
        height: 200px;
        background-color: cadetblue;
        display: inline-block;
        text-align: center;
        line-height: 200px;
        font-size: 30px;
    }
</style>

<body>
    <span>
        李祥
    </span>
</body>
</html>
通过display: flex、 justify-content: center、align-items: center实现。
<!DOCTYPE html>
<html lang="en">
<head>
    <meta charset="UTF-8">
    <meta http-equiv="X-UA-Compatible" content="IE=edge">
    <meta name="viewport" content="width=device-width, initial-scale=1.0">
    <title>Document</title>
</head>

<style>
    span{
        width: 200px;
        height: 200px;
        background-color: cadetblue;
        display: flex;
	    justify-content: center;
        align-items: center;
        font-size: 30px;
    }
</style>

<body>
    <span>
        李祥
    </span>
</body>
</html>
运行效果:

(2)块级元素
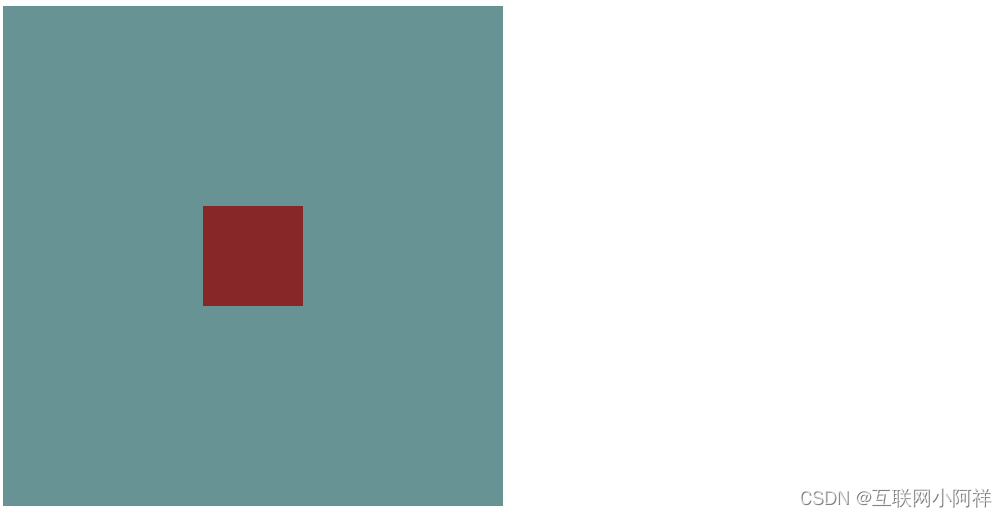
position + transform实现
<!DOCTYPE html>
<html lang="en">
<head>
    <meta charset="UTF-8">
    <meta http-equiv="X-UA-Compatible" content="IE=edge">
    <meta name="viewport" content="width=device-width, initial-scale=1.0">
    <title>Document</title>
    <style>
        .a1 {
            width: 500px;
            height: 500px;
            background-color: cadetblue;
            position: relative;
        }
        .a2 {
            width: 100px;
            height: 100px;
            background-color: brown;
            position: absolute;
            top: 50%;
            left: 50%;
            transform: translate(-50%,-50%);
        }
    </style>
</head>
<body>
    <div class="a1">
        <div class = "a2"></div>
    </div>
</body>
</html>
flex实现
<!DOCTYPE html>
<html lang="en">
<head>
    <meta charset="UTF-8">
    <meta http-equiv="X-UA-Compatible" content="IE=edge">
    <meta name="viewport" content="width=device-width, initial-scale=1.0">
    <title>Document</title>
    <style>
        .a1 {
            width: 500px;
            height: 500px;
            background-color: cadetblue;
            display: flex;
            justify-content: center;
            align-items: center;
        }
        .a2 {
            width: 100px;
            height: 100px;
            background-color: brown;
        }
    </style>
</head>
<body>
    <div class="a1">
        <div class = "a2"></div>
    </div>
</body>
</html>
运行效果:
3.7.CSS⾼级知识点之BFC
-
定义
- 块格式化上下⽂(Block Formatting Context,BFC)是Web⻚⾯的可视化CSS渲染的⼀部分,是块盒⼦的布局过程发⽣的区域,也是浮动元素与其他元素交互的区域。
- 即:形成了⼀块封闭的区域,能检测到区域内脱离⽂档流的元素
-
特点
- css中隐含的属性,开启后不会被浮动的元素覆盖
- BFC元素可以包含浮动元素
- BFC元素的子元素和父元素外边距不重叠
-
开启(都会有副作用)
- 设置元素浮动 float:left
- 设置为行内块元素 display:inline-block
- overflow:hidden(推荐)
-
作⽤
- 清除浮动带来的影响
- 解决边距塌陷问题(外边距折叠(Margin collapsing)也只会发⽣在属于同⼀BFC的块级元素之间)
4.CSS3常用属性讲解
4.1. CSS3边框样式
(1)圆角边框
border-radius:为元素添加圆角边框
四个值时:border-radius:30px 20px 30px 10px;(每个数值表示的是圆角的半径值,将每个角的水平和垂直半径都设置为对应的数值)
左上(10px),右上(20px),右下(30px),左下(10px)
<!DOCTYPE html>
<html lang="en">
<head>
    <meta charset="UTF-8">
    <meta http-equiv="X-UA-Compatible" content="IE=edge">
    <meta name="viewport" content="width=device-width, initial-scale=1.0">
    <title>Document</title>
</head>
<style>
    div{
        width: 200px;
        height: 200px;
        margin: 0 auto;
        border: 3px solid red;
        border-radius: 10px;
    }
</style>
<body>
    <div></div>
</body>
</html>
运行效果:

(2)盒阴影
box-shadow 属性接受值最多由五个不同的部分组成。
box-shadow: offset-x offset-y blur spread color position;
对象选择器 {box-shadow:X轴偏移量 Y轴偏移量 阴影模糊半径 阴影扩展半径 阴影颜色 投影方式 }
不像其它的属性,比如 border,它们的接受值可以被拆分为一系列子属性,box-shadow 属性没有子属性。这意味着记住这些组成部分的顺序更加重要,尤其是那些长度值。
<!DOCTYPE html>
<html lang="en">
<head>
    <meta charset="UTF-8">
    <meta http-equiv="X-UA-Compatible" content="IE=edge">
    <meta name="viewport" content="width=device-width, initial-scale=1.0">
    <title>Document</title>
</head>
<style>
    div{
        width: 200px;
        height: 200px;
        margin: 0 auto;
        background-color: cadetblue;
        box-shadow: 2px 2px 10px black;
    }
</style>
<body>
    <div></div>
</body>
</html>

(3)边界图片
border-image属性可以通过一些简单的规则,将一副图像划分为 9 个单独的部分,浏览器会自动使用相应的部分来替换边框的默认样式。
<!DOCTYPE html>
<html lang="en">
<head>
    <meta charset="UTF-8">
    <meta http-equiv="X-UA-Compatible" content="IE=edge">
    <meta name="viewport" content="width=device-width, initial-scale=1.0">
    <title>Document</title>
</head>
<style>
    div{
        width: 200px;
        height: 200px;
        margin: 0 auto;
        border: 20px solid red;
        border-image: url('https://gw.alicdn.com/imgextra/i3/O1CN01iyYdem1GQd1yGgA0a_!!6000000000617-0-tps-2500-600.jpg');
    }
</style>
<body>
    <div></div>
</body>
</html>
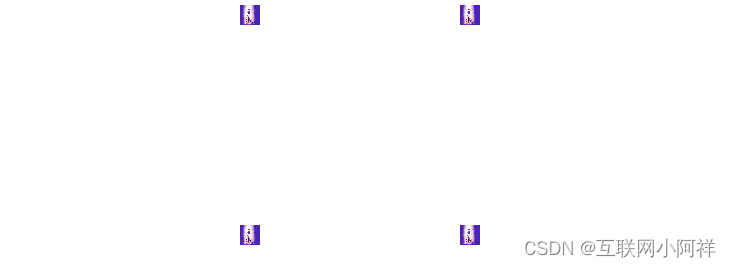
4.2.CSS3渐变样式
linear-gradient() 函数用于创建一个线性渐变的图像。
语法: background: linear-gradient(direction, color-stop1, color-stop2, …);
direction: 用角度值指定渐变的方向。
- 方向值:常用的是to top,to bottom,to left,to right,to right top等等。
- 角度值:常用的是0deg、180deg等等。
coler: 使用关键字red、rgba等颜色值(透明也可以设置)。
stop: 是这个颜色块终止位置,换句话说就是这块颜色占的区域。
(1)从上到下渐变(默认情况下)
background: linear-gradient(#e66465, #9198e5);
<!DOCTYPE html>
<html lang="en">
<head>
    <meta charset="UTF-8">
    <meta http-equiv="X-UA-Compatible" content="IE=edge">
    <meta name="viewport" content="width=device-width, initial-scale=1.0">
    <title>Document</title>
</head>
<style>
    div{
        width: 200px;
        height: 200px;
        margin: 0 auto;
        background: linear-gradient(#e66465, #9198e5);
    }
</style>
<body>
    <div></div>
</body>
</html>

(2)从左到右渐变
background: linear-gradient(to right, red , yellow);
<!DOCTYPE html>
<html lang="en">
<head>
    <meta charset="UTF-8">
    <meta http-equiv="X-UA-Compatible" content="IE=edge">
    <meta name="viewport" content="width=device-width, initial-scale=1.0">
    <title>Document</title>
</head>
<style>
    div{
        width: 200px;
        height: 200px;
        margin: 0 auto;
        background: linear-gradient(to right, red , yellow);
    }
</style>
<body>
    <div></div>
</body>
</html>
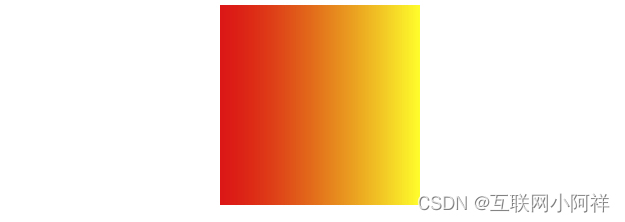
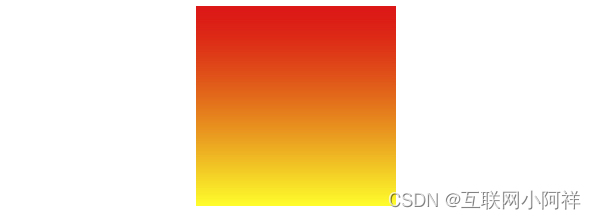
(3)对角渐变
background: linear-gradient(to bottom right, red, yellow);
<!DOCTYPE html>
<html lang="en">
<head>
    <meta charset="UTF-8">
    <meta http-equiv="X-UA-Compatible" content="IE=edge">
    <meta name="viewport" content="width=device-width, initial-scale=1.0">
    <title>Document</title>
</head>
<style>
    div{
        width: 200px;
        height: 200px;
        margin: 0 auto;
        background: linear-gradient(to bottom, red , yellow);
    }
</style>
<body>
    <div></div>
</body>
</html>
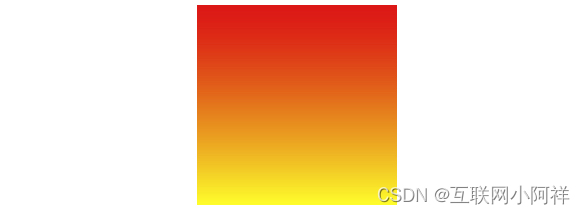
(4)角度从上到下
background: linear-gradient(180deg, red, yellow);
<!DOCTYPE html>
<html lang="en">
<head>
    <meta charset="UTF-8">
    <meta http-equiv="X-UA-Compatible" content="IE=edge">
    <meta name="viewport" content="width=device-width, initial-scale=1.0">
    <title>Document</title>
</head>
<style>
    div{
        width: 200px;
        height: 200px;
        margin: 0 auto;
        background: linear-gradient(180deg, red, yellow);
    }
</style>
<body>
    <div></div>
</body>
</html>
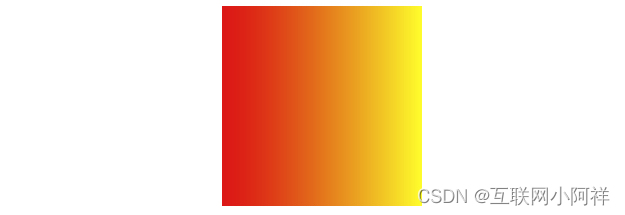
(5)角度从左到右
background: linear-gradient(90deg, red, yellow);
<!DOCTYPE html>
<html lang="en">
<head>
    <meta charset="UTF-8">
    <meta http-equiv="X-UA-Compatible" content="IE=edge">
    <meta name="viewport" content="width=device-width, initial-scale=1.0">
    <title>Document</title>
</head>
<style>
    div{
        width: 200px;
        height: 200px;
        margin: 0 auto;
        background: linear-gradient(90deg, red, yellow);
    }
</style>
<body>
    <div></div>
</body>
</html>
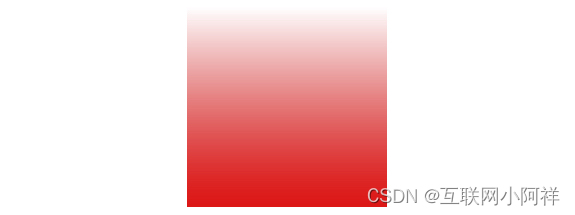
(6)透明度设置
background: linear-gradient(rgba(255,0,0,0), rgba(255,0,0,1));
<!DOCTYPE html>
<html lang="en">
<head>
    <meta charset="UTF-8">
    <meta http-equiv="X-UA-Compatible" content="IE=edge">
    <meta name="viewport" content="width=device-width, initial-scale=1.0">
    <title>Document</title>
</head>
<style>
    div{
        width: 200px;
        height: 200px;
        margin: 0 auto;
        background: linear-gradient(rgba(255,0,0,0), rgba(255,0,0,1));
    }
</style>
<body>
    <div></div>
</body>
</html>
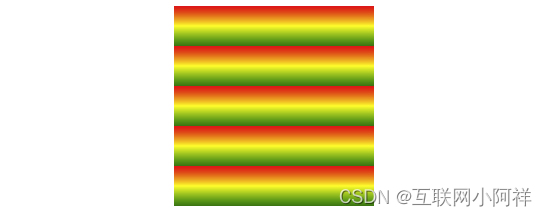
(7)设置重复的渐变区域
background: repeating-linear-gradient(red, yellow 10%, green 20%);
<!DOCTYPE html>
<html lang="en">
<head>
    <meta charset="UTF-8">
    <meta http-equiv="X-UA-Compatible" content="IE=edge">
    <meta name="viewport" content="width=device-width, initial-scale=1.0">
    <title>Document</title>
</head>
<style>
    div{
        width: 200px;
        height: 200px;
        margin: 0 auto;
        background: repeating-linear-gradient(red, yellow 10%, green 20%);
    }
</style>
<body>
    <div></div>
</body>
</html>
4.3.CSS3文本效果
(1)文本阴影
text-shadow: 5px 5px 5px #FF0000;
<!DOCTYPE html>
<html lang="en">
<head>
    <meta charset="UTF-8">
    <meta http-equiv="X-UA-Compatible" content="IE=edge">
    <meta name="viewport" content="width=device-width, initial-scale=1.0">
    <title>Document</title>
</head>
<style>
    span{
        font-size: 50px;
        text-shadow: 5px 5px 5px #FF0000;
    }
</style>
<body>
    <span>
        李祥
    </span>
</body>
</html>

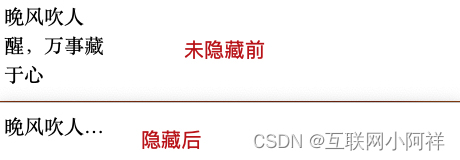
(2)文本溢出超过1行省略
overflow: hidden;
white-space: nowrap;
text-overflow: ellipsis;
<!DOCTYPE html>
<html lang="en">
<head>
    <meta charset="UTF-8">
    <meta http-equiv="X-UA-Compatible" content="IE=edge">
    <meta name="viewport" content="width=device-width, initial-scale=1.0">
    <title>Document</title>
</head>
<style>
    div{
        width: 100px;
        height: 100px;
        font-size: 20px;
        overflow: hidden;
        white-space: nowrap;
        text-overflow: ellipsis;
    }
</style>
<body>
    <div>
        晚风吹人醒,万事藏于心
    </div>
</body>
</html>
(3)文本溢出超过2行省略
overflow: hidden;
text-overflow: ellipsis;
display: -webkit-box;
-webkit-box-orient: vertical;
-webkit-line-clamp: 2;
<!DOCTYPE html>
<html lang="en">
<head>
    <meta charset="UTF-8">
    <meta http-equiv="X-UA-Compatible" content="IE=edge">
    <meta name="viewport" content="width=device-width, initial-scale=1.0">
    <title>Document</title>
</head>
<style>
    div{
        width: 100px;
        height: 100px;
        font-size: 20px;
        overflow: hidden;
        text-overflow: ellipsis;
        display: -webkit-box;
        -webkit-box-orient: vertical;
        -webkit-line-clamp: 2;
    }
</style>
<body>
    <div>
        晚风吹人醒,万事藏于心
    </div>
</body>
</html>

4.4.CSS3网格布局
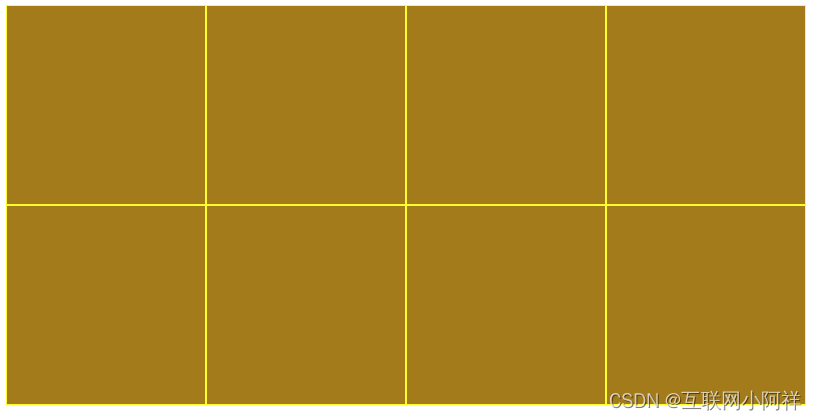
网格布局,顾名思义就是像网一样有一个个格子一样的布局。在一个容器里面,我们可以切割成很多行很多列,形成一个个网格,从而对这些网格进行规则性的排序,使用,达到我们复杂的页面布局效果。
Grid 布局与 Flex 布局有一定的相似性,都可以指定容器内部多个项目的位置。但是,它们也存在重大区别。
类似哔哩哔哩首页这种网格状的排版。
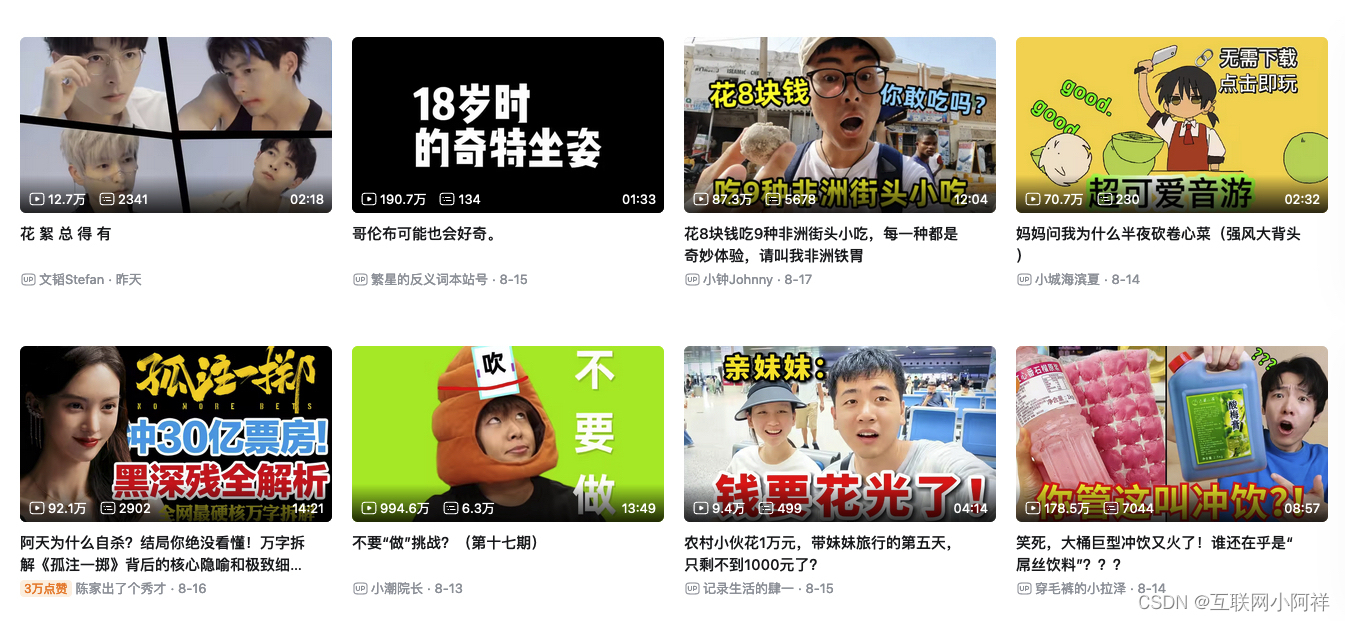
直接上代码,采用Grid实现。
<!DOCTYPE html>
<html lang="en">
<head>
    <meta charset="UTF-8">
    <meta http-equiv="X-UA-Compatible" content="IE=edge">
    <meta name="viewport" content="width=device-width, initial-scale=1.0">
    <title>Document</title>
</head>
<style>
    .box{
        width: 800px;
        height: 400px;
        background-color: cadetblue;
        display: grid;
        grid-template-columns: 25% 25% 25% 25%;
        grid-template-rows: 50% 50%;

    }
    .child{
        width: 200px;
        height: 200px;
        background-color: darkgoldenrod;
        border: 1px solid yellow;
        box-sizing: border-box;
    }
</style>
<body>
    <div class="box">
        <div class="child"></div>
        <div class="child"></div>
        <div class="child"></div>
        <div class="child"></div>
        <div class="child"></div>
        <div class="child"></div>
        <div class="child"></div>
        <div class="child"></div>
    </div>
</body>
</html>
运行效果:
OK,至此Html+CSS的知识点就整理完成啦,觉得博主写的不错的,记得给个三连哦!

- 程序开发学习排行
- 最近发表


